GENERAL
Leak Fix 101: DIY Plumbing Repairs That Save You Money
Homeownership comes with its fair share of challenges, and unexpected leaks rank high on that list. Whether it’s a dripping faucet that’s keeping you up at night or a running toilet that’s hiking up your water bill, leaks are nuisances that can lead to significant waste and expense if not addressed. But here’s the good news: many common plumbing issues can be fixed with a bit of DIY savvy, saving you money and the hassle of immediate professional intervention.
Identifying Leaks: The Early Warning Signs
Catching a leak early can be the difference between a simple DIY fix and a costly repair. Keep an eye (and an ear) out for these signs:
- Unexplained spikes in your water bill
- The sound of running water when all taps are off
- Mold or mildew formation, especially in unexpected areas
- Wet spots on floors, ceilings, or walls
Types of Leaks and Their Usual Suspects
Leaks can originate from multiple sources, each with common culprits:
- Water Heater Leak: Often due to a faulty pressure relief valve or corroded tank.
- Faucet Leak: Typically caused by worn-out washers or gaskets.
- Toilet Leak: This usually stems from a degraded flapper or a malfunctioning fill valve.
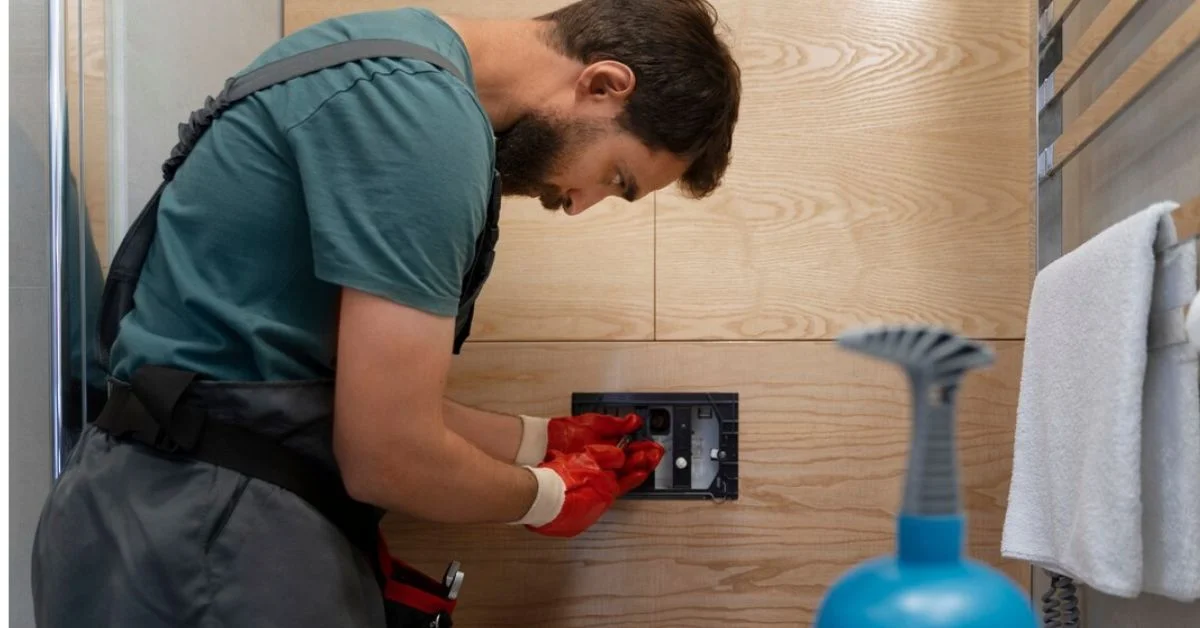
DIY Repair Guides
1. Water Heater Leak: Replacing the Pressure Relief Valve
Safety first: turn off the power and water supply to your heater. Locate the pressure relief valve—usually on the side or top. If water leaks from the valve when the lever is lifted, it’s time for a replacement.
If you’re uncomfortable with this task or suspect the issue with your water heater might be more complex, considering professional water heater service in Kaysville could be your next best step. Professionals can offer comprehensive assessments and repairs for issues that might be beyond the DIY scope.
2. Faucet Leak: Repairing with a Washer Replacement
Shut off the water supply beneath the sink. Disassemble the faucet handle and spout to access the faulty washer. Replace it with a new one that matches in size and secures everything back in place.
3. Toilet Leak: Fixing a Running Toilet
First, identify whether the flapper or fill valve is the culprit by checking for a seal failure or water overflow, respectively. Replacing either part is straightforward—turn off the supply, drain the tank, and swap out the old part for a new one.
Tools Needed
Tackling these repairs requires some basic tools:
- Adjustable wrenches
- Plumber’s tape
- Replacement parts (washers, valves)
- Screwdrivers
- Flashlight
Safety Measures
Even simple repairs come with risks. Always:
- Turn off the water supply to the area you’re working on
- Wear gloves to protect from sharp objects and hot surfaces
- Ensure your work area is well-lit and dry
When to Call a Professional
Some scenarios are best left to the experts. If you encounter extensive damage, signs of water damage in walls or ceilings, or if a leak persists after your fix, seek professional assistance. It’s better to catch and address potential issues early on than risk costly repairs down the line.
Preventing Future Leaks
Regular maintenance and upkeep can help prevent leaks from occurring in the first place. Some tips include:
- Checking for leaks regularly
- Replacing old fittings or parts before they deteriorate
- Investing in a leak detection system or smart
Conclusion
Mastering minor plumbing repairs not only saves you money but also equips you with skills that come in handy during home emergencies. While not every leak can be solved in the DIY realm, many can, with a bit of knowledge and the right tools. We encourage you not to shy away from tackling these manageable repairs—it’s a gratifying step towards self-sufficiency and a cautious approach to home maintenance.


Termites can turn your home into a feast, causing significant damage quietly and quickly. The signs are often subtle until the damage is significant.
This is where hiring pest control specialists comes in, offering not a solution but peace of mind. These experts bring with them the knowledge, tools, and strategies to efficiently tackle termite infestations.
Their intervention can save you time, money, and the structural integrity of your home. Opting for professional pest control specialists is an investment in your property and a safeguard against future invasions.
Don’t wait until it’s too late; secure your home today. Read on!
Expert Identification and Assessment
Professionals in pest control know how to correctly identify termite species and figure out how bad an infestation is. They use cutting-edge tools and technologies to carefully look into even the most hidden places. This exact identification and evaluation are necessary for making a treatment plan that will get rid of termites.
Access to Advanced Treatment Options
Professional pest control services give you access to advanced infestation prevention options that regular people don’t have, such as eco-friendly and pet-safe options. These methods are meant to get rid of termite colonies effectively while doing as little damage as possible to your home and the environment. Using these specialized treatments will get rid of termite infestations completely and for good.
Prevention of Future Infestations
Not only do pest control professionals get rid of current termite infestations, but they also take steps to keep your home safe from future invasions. This means putting up barriers and using materials that are resistant to termites. It is suggested that you have regular inspections done to make sure that your home stays safe from termites all year long.
Time and Money Savings
It may seem like an extra cost to hire professionals, but it will save you money in the long run. When people try to get rid of termites on their own, they often only treat the symptoms and not the cause.
This can lead to ongoing costs and damage to the property. Experts can get rid of the infestation more effectively, which will save you money on repairs.
Safety Measures
Professionals who get rid of pests put safety first and use methods that are safe for your family and pets. Their knowledge makes sure that treatments are done right, which lowers the risk of being exposed to harmful chemicals. By hiring these experts, you’re also protecting your health from the risks that could come from using pesticides incorrectly.
Peace of Mind
Knowing that your home is free from termites and protected against future infestations offers invaluable peace of mind. Professional termite control services in Arizona are equipped to provide thorough and reliable services, ensuring your home remains safe and intact.
Why Trusting Pest Control Specialists Is Your Best Defense
To keep your home safe from termite damage, you need to hire pest control specialists. These efficient termite removal know what they’re doing and use cutting-edge methods.
Homeowners save time and money with long-term protection from prevention strategies. Professional pest control gives you the most peace of mind.
The best way to protect yourself from termites (the silent threat) is to hire a pest control professional. You should trust their knowledge to keep your property safe.
Did you like this guide? Great! Please browse our website for more!

According to a new study from Investopedia, the classic American dream of a happy marriage, 2 kids, homes, cars, healthcare and education is now an estimated $3.4 million over the course of a lifetime. No, we don’t mean to crush your dream with this statistic, but we simply wish to point out that the elusive ‘American Dream’ costs far more than most people earn. Hence, the trusty paycheck just won’t cut it. You need a side hustle (or multiple side hustles) that will help bridge the gap between how much you are making and hope to make in a month. So, fellow hustlers, buckle in as we take you on an exciting, eye-opening journey of 8 exciting ways to earn money in the USA. And no, lemonade stands are not on our list of side hustles!
● Get paid to play!
Remember all those hours spent dominating your friends at Fortnite? Turns out, those skills can actually pay the bills. The world of competitive video gaming is exploding, and how! Several platforms are hosting tournaments and contests offering prize pools in the millions. All you have to do is hone your strategic thinking, practice those headshots, and join local tournaments or online leagues. If Fortnite and similar action games are not your forte, check out card games or casual games. Playing games like Ludo and Snakes & Ladder can also help you win cash prizes. There are also other interesting games, such as the Crash money game. This game tests your deduction and analysis skills as you have to place your bets before the rocket takes off. Also, you must cash out before the rocket crashes. So, this game is sure to keep you on your toes. Who knew getting good at playing video or mobile games could be your ticket to financial freedom? Just don’t let your opponents dominate you!
● Freelancing
Do you have a knack for animation, graphic design, or writing? The freelance market is your oyster! Platforms like Fiverr and Upwork connect you with individuals and businesses actively seeking creative talent for projects of all sizes and shapes. Whether it is crafting social media content, designing logos, or whipping up catchy slogans, your creative skills can be a goldmine. Bonus points for upskilling and adding new features to your hat.
● Rent out your stuff
Remember that fancy juicier you used twice or thrice or that barely-touched designer bag gathering dust in your closet? The sharing economy is here to help you turn your underutilized possessions into passive income.
Turo and similar platforms connect you with people who need to rent cars, while Airbnb lets you transform your spare room into a mini-hotel suite. You can also help your idle tech gadgets find a new lease on life through gadget rental services. Ensure you are comfortable renting out things and won’t regret your decision later.
● Influencer marketing
Do you have a knack for creating TikTok videos or an engaging Instagram feed? Brands are always looking for social media influencers to promote their products. So, if you already have an interesting social media account with a loyal following, you might be sitting on a goldmine. Partner with brands for sponsored posts, develop your own merchandise, or create affiliate links.
● Tutor online
Did you ace your school and college exams? Were you considered somewhat of a prodigy? Turns out, you can translate your academic prowess into serious cash. Wyzant, Chegg and other online tutoring platforms connect you with students actively seeking academic help. Whether it is mastering a foreign language, high school algebra or English literature, you can share your knowledge and get paid for it. Bonus point for helping your students flourish and have a fulfilling life.
● Voiceover artist
Do you have a voice that can melt butter? You might not know, but the world of voice acting is booming. From explainer videos to audiobook and radio commercials, there is a voiceover gig out there for everyone. To start practicing different tones and voices, invest in a decent microphone and soundproof a corner of your room. Voices.com, VoiceBunny, and similar platforms connect you with potential clients to help you take off your career in voice acting.
● Dog walking and pet sitting
Do you love animals and have a way with them? Dog walking or pet sitting are amazing ways to turn your affection for furry friends into income. Connect with pet owners who require help caring for their furry companions. Whether it is in-home pet sitting, daily walks, or playing fetch in the park, you can get paid to do what you love.
● The odd jobs marketplace
Have you tapped into the odd jobs marketplace yet? There is a whole world of passive income opportunities waiting for you. There’s something for everyone. For example, the TaskRabbit platform. This excellent platform connects people with those who can tackle odd jobs. The jobs vary from requiring help mounting a TV, assembling furniture and food delivery to everything in between. There is someone on the TaskRabbit to handle these jobs – and that someone can be you! So, leverage your practical skills and get paid for delivering food, fixing things, cleaning spaces or running simple errands for busy individuals.
Conclusion: Keep the American Dream alive!
The American Dream might be expensive but it is very much alive. The world of work is rapidly changing, and traditional 9-5 grind isn’t the only path to achieving financial freedom. With a little creativity, some hustle, and the right platform, you can turn your skills, passion, and your love of video games into real income. So, don’t be stuck within the limitations of the old way of doing things. Break out from the traditional restrictions and embrace the brand-new possibilities of the digital age. Some of the exciting ways to earn money in the USA are mentioned above, but these are just the starting point. Keep exploring as new side hustles come up daily, such as writing transcriptions, becoming a digital voice assistant, using in-chat support, etc.

Isn’t it frustrating when you need iphone repairs in dubai? iPhones are renowned for their durability, sleek design, and high tech features. However, accidents happen, and screens can get cracked or damaged. When this occurs, it’s vital to have it repaired by a trusted professional. Fret not, we’ve got you covered! This guide will walk you through the steps to ensure your iPhone screen is replaced effectively and professionally in Dubai.
Determine the extent of the damages
First, it’s essential to understand the extent of the damage to your iPhone screen. It could range from a minor crack that doesn’t impede your interface with the phone to severe damage that makes it almost impossible to use your device. Comprehensive knowledge of the harm helps in deciding the best next step for your iPhone repairs.
Backup your data
Before you hand over your device to anyone for repairs, always ensure you’ve backed up every essential data. iPhones offer different options for this; you can backup your data directly to your iCloud or iTunes on your computer.
Choose a credible repair service
Choosing a credible repair service is crucial to ensure quality work. Not all repair services are proficient with iPhones, and even fewer specialize in screen replacements. Therefore, make sure you select a repair service experienced with iPhone repairs for the best results.
Cost of iPhone screen replacement in Dubai
Typically, the cost of an iPhone screen repair or replacement can range depending on the model of your iPhone and the extent of the damage. It’s advisable to call several shops and compare prices before deciding who will fix your phone. However, remember that cost should not compromise the quality of the repair.
Repairing Time
The time it takes to repair your iPhone screen depends on the extent of the damage and the business of the repair centre. Some centres offer one-day service, but this could be longer if the damage to your phone is quite extensive.
After Repair Care
Lastly, after your iPhone screen is replaced, it’s important that you take care not to repeat the same mistakes that led to the damage initially. Invest in a sturdy phone case or a screen protector to avoid future accidents. In conclusion, dealing with a damaged iPhone screen can be frustrating. However, with proper guidance and reputable options for iPhone repairs in Dubai, the process can be smooth and worry-free. Just remember to backup and protect your phone to ensure its lifespan.


 ENTERTAINMENT4 days ago
Exploring the Kristen Archives: A Treasure Trove of Erotica and More

 TECHNOLOGY4 months ago
Blog Arcy Art: Where Architecture Meets Art
- ENTERTAINMENT1 day ago
Kiss KH: The Streaming Platform Redefining Digital Engagement and Cultural Currents
- EDUCATION1 day ago
Lingrohub Platform: A Complete Student Access Guide
- LIFESTYLE4 months ago
The Disciplinary Wives Club: Spanking for Love, Not Punishment
- TECHNOLOGY1 day ago
Casibom: The Digital Alchemy Reshaping Systems, Society, and Self

 TECHNOLOGY1 day ago
Securing Your Online Presence: The Ultimate Guide to Buying an SSL Certificate
 HEALTH1 day ago
The Surprising Benefits of Weight Loss Peptides You Need to Know