HOME IMPROVEMENT
The Ultimate Guide to Using a Commercial Steam Carpet Cleaner: Tips and Tricks
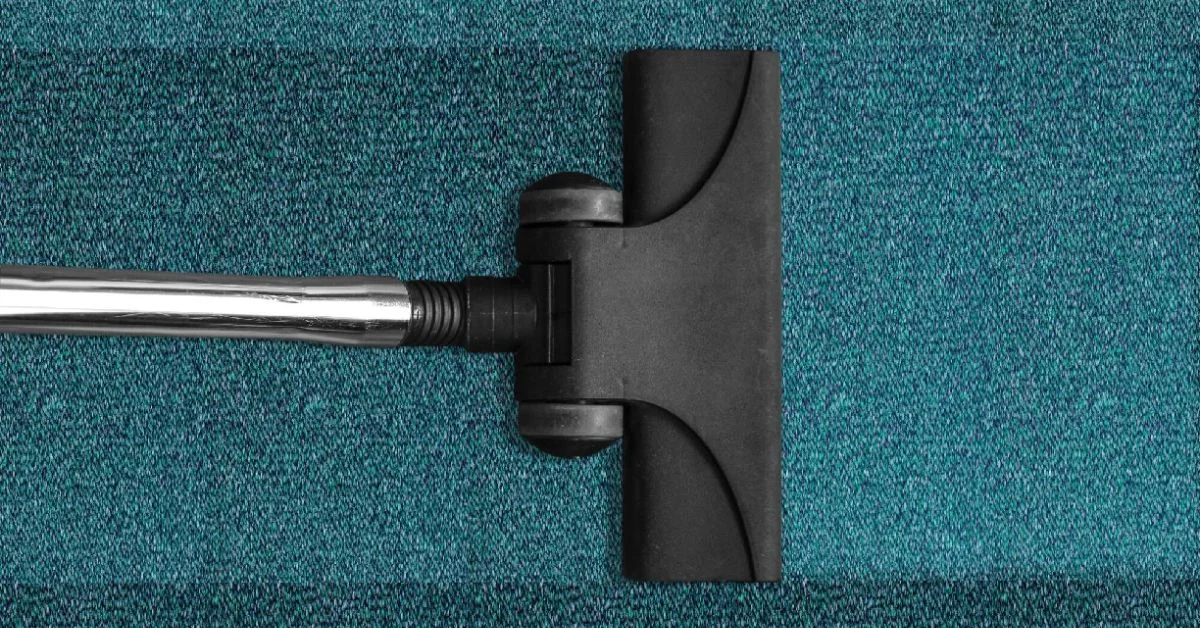
Are you looking to revitalize and refresh your carpets? Then, a commercial steam carpet cleaner could be a game-changer in the deep cleaning you’re looking for. Unlike traditional methods that use harsh chemicals, these advanced machines harness the power of steam to lift dirt and grime without leaving behind residue.
Excited? Then continue reading. This listicle walks you through the essentials of equipment usage, ensuring that your carpets get the treatment they deserve.
Let’s dive in!
Benefits Galore
Commercial steam cleaners offer an array of benefits that make them a popular choice for carpet maintenance. They’re eco-friendly. They reduce the need for chemical-based solutions.
The high-temperature steam can kill allergens, pests, and bacteria, providing a healthier environment. Plus, the gentle steam helps to extend the life of your carpet by keeping the fibers intact.
Essential Tips
Before you power up your commercial steam cleaner, it’s crucial to grasp the foundational practices that will maximize your cleaning efforts. Here are some steam-cleaning tips you should follow before getting started:
Prepare Your Space and Carpet
Before firing up your steamer, start with a thorough vacuuming to remove loose dirt. Then, address any furniture that needs to be moved. This helps ensure that you can clean every section of the carpet.
Choose the Right Cleaner and Accessories
Different carpet types and cleaning needs require specific steam cleaner models and accessories. Always check the manufacturer’s recommendations for your particular carpet fibers.
Accessories play a crucial role in the outcome. Be it a cylindrical brush for high-pile carpets or squeegee attachments for low-pile carpets.
Understanding the Cleaning Process
Steam cleaning involves more than just pushing and pulling the machine. It’s about setting the right temperature and pressure to ensure thorough cleaning while being careful not to saturate the carpet.
Step-By-Step Guide to Steam Clean Your Carpet
As every carpet is unique, it’s best to read the user manual of your commercial steam cleaner thoroughly. However, here are the basic steps you can follow:
Clear the Area and Pre-treating Stains
Remove all small items from the floor and furniture from the room. Before you start using the steamer, spot-treat any visible stains using a pre-treatment solution compatible with your cleaner. This improves stain removal.
Set up and Using the Cleaner
Fill the steamer with water and any recommended cleaning solution, then turn it on to allow it to heat up. Begin cleaning slowly, ensuring you overlap your strokes for complete coverage. Pay extra attention to areas of high traffic and any stubborn stains.
Drying and Post-Cleaning Care
Once the carpet is cleaned, leave it to dry completely. Use fans or open windows to expedite the process.
Dealing With Tough Stains
For difficult stains or heavily soiled areas, consider running the steam cleaner over the spot multiple times. You can also use a specialized cleaning attachment.
If the stain still won’t come off, try reaching out to this company that offers services of carpet cleaning in Woodland Hills. They know deep cleaning methods that can effectively remove stubborn stains.
A Commercial Steam Carpet Cleaner Is a Valuable Investment
Owning a commercial steam carpet cleaner can save you time, effort, and money in the long run. With some basic knowledge and practice, you can keep your carpets looking new with regular steam cleaning sessions. The benefits of using a commercial steam cleaner extend beyond just carpet cleaning.
So, what are you waiting for? Get started on your journey towards clean and healthy carpets today!
Did you find this article helpful? If so, check out the rest of our site for more.


Proper ventilation is crucial in maintaining the health and longevity of your home. While often overlooked, roof ventilation plays a pivotal role in enhancing indoor air quality. It prevents damage and ensures the efficiency of your heating and cooling systems.
In this comprehensive blog post, we’ll unlock the secrets of proper ventilation with insights from professional roofing experts. So, read on!
Importance of Balanced Ventilation
Proper ventilation is the key to maintaining a healthy and comfortable home environment. It allows for the exchange of stale indoor air with fresh outdoor air. This prevents a buildup of harmful contaminants such as:
- mold
- mildew
- pollutants
This is especially important in areas where extreme temperatures or high humidity levels are common. Moreover, a balanced ventilation system ensures energy efficiency. This is achieved by regulating the temperature and moisture levels in your home.
This can result in substantial cost savings on heating and cooling bills. From roof flashing repair to attic insulation, a well-ventilated home can also prevent expensive damage and extend the lifespan of your roof.
Types of Ventilation Systems
There are two main types of roofing ventilation systems – intake and exhaust. Intake vents allow fresh air to enter your home, while exhaust vents release stale air outside. A balanced combination of both is essential for proper ventilation.
Intake vents are typically located along the eaves or soffits of your roof. Exhaust vents can be found at the ridge or gable ends. There are various types of intake and exhaust vents, including:
- soffit vents
- ridge vents
- gable vents
- turbine vents
Everything depends on the design and size of your roof. A combination of these vents may be used to ensure optimal ventilation.
Signs of Poor Ventilation
Poor ventilation can lead to various issues in your home, from mold growth and moisture damage to increased energy costs. Some common signs of poor ventilation include musty odors, condensation on windows, peeling paint or wallpaper, and mold growth in the attic or other areas of the house.
If you notice any of these signs, it’s crucial to address them promptly and consult a professional roofing contractor to assess your ventilation system.
Benefits of Proper Ventilation
Proper ventilation not only maintains a healthy home environment but also offers several other benefits. It can prolong the lifespan of your roof by preventing moisture buildup and damage. Thus, saving you from costly repairs or replacements.
In addition, proper ventilation helps regulate temperature and moisture levels in your attic, which can prevent ice dams from forming on your roof during the winter months. This can also protect your roof from potential leaks and water damage.
Professional Assessment and Installation
When it comes to proper ventilation, it’s best to consult roofing contractors from sites like https://adamsandsonsroofing.com/roof-replacement/. They have the knowledge and expertise to assess your current ventilation system and recommend any necessary improvements.
Professional installation is also crucial in ensuring that your vents are properly placed and sized for optimal ventilation. A trained contractor can also identify any potential issues with your roof that may be contributing to poor ventilation.
Discover Some Insights from Professional Roofing Experts
Proper ventilation is a crucial aspect of maintaining a healthy and efficient home. By learning some insights from professional roofing experts, you can ensure that your home has a balanced and effective ventilation system.
So, don’t neglect the importance of proper ventilation in your home, and consult a professional to ensure that your roof is adequately ventilated.
If you want to read more, visit our blog page. We have more topics!

Are you wondering when to consider hiring siding contractors in Vancouver? Your home’s exterior is its first line of defense against the elements, and siding plays a critical role in protecting and enhancing your property. Knowing when to contact a siding contractor is essential for maintaining your home’s integrity and aesthetics. We will explore various scenarios and indicators that suggest it’s time to contact a professional siding contractor to ensure your home remains in top condition and continues to provide comfort and safety.
Visual Signs of Siding Wear and Damage
One of the most obvious reasons to contact a siding contractor is the presence of visible wear and damage. This can include cracked, warped, or rotted siding panels, which detract from your home’s appearance and compromise its structural integrity. Other signs, such as fading color and mold or mildew growth, indicate that the siding’s ability to protect the home is diminishing. Homeowners should conduct regular visual inspections of their siding and consider contacting a contractor if they notice any of these issues, as early intervention can prevent more extensive and costly repairs.
After Severe Weather Events
Severe weather can severely impact the condition of your home’s siding. It is prudent to check the exterior thoroughly after events such as heavy storms, hail, or high winds. Any storm damage, such as dents, cracks, or torn-off pieces, should be addressed promptly. Contacting a siding contractor for an inspection after such events can help ensure that all damage is professionally assessed and remedied, protecting your home from future weather-related vulnerabilities.
Energy Efficiency Concerns
If you notice a sudden increase in your heating or cooling bills, it could be due to inefficiencies caused by your home’s siding. Older or poorly installed siding can allow air to leak in and out of your home, leading to increased energy use and higher utility bills. A siding contractor can assess if your siding is the cause of these issues and recommend solutions such as repair or replacement with more energy-efficient materials, ultimately helping to reduce your energy costs and improve the comfort of your home.
Preparing for Home Sale
For homeowners considering selling their property, contacting a siding contractor can be a wise move. New siding can significantly enhance curb appeal, potentially increasing the market value of your home and making it more attractive to prospective buyers. A siding upgrade can offer a fresh, appealing look and convey to buyers that the home has been well-maintained, accelerating the sale process and possibly resulting in a higher selling price.
Outdated or Undesirable Siding
Trends in home design can change over the years, and what was once fashionable may now appear dated. If your home’s siding is from a bygone era or doesn’t align with your current aesthetic preferences, it might be time to contact a siding contractor. Updating your siding can transform your home’s appearance and increase your satisfaction with your living space. Furthermore, new materials and technologies might offer better durability and maintenance benefits than what was available when your current siding was installed.
Regular Maintenance Check-Up
Even if your siding isn’t showing obvious signs of damage, regular check-ups by a professional can be crucial for long-term maintenance. A siding contractor can offer expert insights into the condition of your siding and perform preventative maintenance tasks. These check-ups can help extend the life of your siding by addressing minor issues before they become major problems, ensuring continuous protection for your home.
Compliance with Local Building Codes
Local building codes can dictate when to contact a siding contractor is necessary. These regulations often change, and keeping up with current standards is essential for legal compliance and safety. If your home’s siding doesn’t meet these requirements due to age or the materials used, a siding contractor can help you navigate these legal landscapes. Upgrading to compliant materials ensures your home’s safety and legal standing. It can also prevent potential fines or complications if you plan to renovate or sell your home in the future. Regular consultations with a professional can keep you informed and compliant with local building codes.
Determining the right time to contact a siding contractor involves observing your home’s exterior for signs of damage, considering energy efficiency issues, and assessing aesthetic desires. Whether you’re dealing with the aftermath of severe weather, preparing to sell your home, or simply aiming to maintain its condition, professional guidance from a siding contractor can be invaluable. By staying proactive about the condition of your siding, you can maintain your home’s beauty, efficiency, and structural integrity, safeguarding your investment for years to come.
HOME IMPROVEMENT
Transform Your Space with Gamma Cabinetry: The Ultimate Guide to Elevating Your Home Décor

In the realm of interior design, cabinetry plays a pivotal role in defining the aesthetic appeal and functionality of any space. Among the myriad of options available, Gamma Cabinetry stands out as a beacon of innovation, quality, and style. Renowned for its impeccable craftsmanship, versatile designs, and commitment to excellence, Gamma Cabinetry offers homeowners a unique opportunity to elevate their living spaces to new heights. In this comprehensive guide, we will delve into the world of Gamma Cabinetry, exploring its features, benefits, design options, and how it can transform your home into a haven of sophistication and functionality.
1. Unveiling the Essence of Gamma Cabinetry:
Gamma Cabinetry epitomizes the fusion of form and function, seamlessly blending timeless elegance with modern utility. Crafted with precision and attention to detail, each piece exudes a sense of luxury and sophistication. Whether you’re revamping your kitchen, bathroom, or living room, Gamma Cabinetry offers a diverse range of styles, finishes, and configurations to suit every taste and preference. From sleek contemporary designs to classic motifs, there’s a Gamma Cabinetry solution for every discerning homeowner.
2. Craftsmanship Beyond Compare:
At the heart of Gamma Cabinetry lies a tradition of unparalleled craftsmanship. Meticulously crafted by skilled artisans using premium materials, Gamma cabinets are built to last a lifetime. From the selection of finest woods to the precision of joinery, every aspect reflects a dedication to excellence. Each piece undergoes rigorous quality control measures to ensure superior durability and performance, making Gamma Cabinetry a timeless investment in the beauty and functionality of your home.
3. Customization: Tailoring Your Vision:
One of Gamma Cabinetry’s hallmarks is its commitment to customization. Recognizing that every homeowner has unique preferences and requirements, Gamma offers a myriad of customization options to bring your vision to life. Whether you desire a specific finish, hardware, or layout, Gamma’s team of expert designers will work closely with you to create bespoke solutions that perfectly complement your space. With Gamma Cabinetry, the possibilities are limited only by your imagination.
4. Innovative Storage Solutions:
In today’s fast-paced world, efficient storage solutions are paramount to maintaining an organized and clutter-free living environment. Gamma Cabinetry excels in this regard, offering innovative storage solutions that maximize space and functionality. From cleverly designed pull-out drawers to custom-built organizers, Gamma cabinets are engineered to optimize storage capacity without compromising on style. Say goodbye to cluttered countertops and overstuffed cabinets with Gamma Cabinetry, organization is effortless and elegant.
5. Sustainability and Environmental Responsibility:
In an era of increasing environmental awareness, Gamma Cabinetry is committed to sustainability and environmental responsibility. By sourcing materials from certified sustainable forests and employing eco-friendly manufacturing processes, Gamma minimizes its environmental footprint while upholding the highest standards of quality and craftsmanship. Choosing Gamma Cabinetry not only enhances the beauty of your home but also contributes to a more sustainable future for generations to come.
6. Elevating Your Home Décor:
Beyond their practical functionality, Gamma cabinets serve as statement pieces that elevate the overall aesthetic of your home décor. Whether you prefer a minimalist Scandinavian vibe or a lavish Mediterranean ambiance, Gamma Cabinetrys offers endless design possibilities to suit your style. With their sleek lines, exquisite finishes, and attention to detail, Gamma cabinets add a touch of sophistication and refinement to any space, transforming mundane interiors into showcases of elegance and taste.
7. The Gamma Experience:
More than just a provider of cabinets, Gamma offers homeowners an unparalleled experience marked by personalized service, exceptional quality, and enduring value. From the initial design consultation to the final installation, Gamma’s team of experts is dedicated to ensuring your complete satisfaction every step of the way. With Gamma Cabinetry, you’re not just investing in furniture – you’re investing in a lifestyle of luxury, comfort, and timeless elegance.
8. Maximizing Space Efficiency:
In modern living spaces where square footage is often at a premium, Gamma Cabinetry excels in maximizing space efficiency. Through clever design and innovative storage solutions, Gamma cabinets make the most out of every inch, allowing you to optimize storage capacity without sacrificing style. From floor-to-ceiling pantry cabinets that maximize vertical space to modular units that adapt to unconventional layouts, Gamma Cabinetrys offers tailored solutions to suit the unique needs of your space. With Gamma, even the smallest nooks and crannies can be transformed into functional and aesthetically pleasing storage areas, helping you make the most out of your home’s footprint.
In conclusion, Gamma Cabinetrys represents the epitome of excellence in the world of interior design. With its impeccable craftsmanship, versatile designs, and commitment to sustainability, Gamma sets the standard for quality and innovation in cabinetry. Whether you’re renovating your kitchen, bathroom, or living room, Gamma Cabinetrys offers bespoke solutions that seamlessly blend style and functionality, elevating your home décor to new heights of sophistication and luxury. Choose Gamma Cabinetrys and embark on a journey of timeless elegance and enduring beauty in your home.


 HOME IMPROVEMENT1 year ago
The Do’s and Don’ts of Renting Rubbish Bins for Your Next Renovation
- BUSINESS1 year ago
Exploring the Benefits of Commercial Printing
- HOME IMPROVEMENT9 months ago
Get Your Grout to Gleam With These Easy-To-Follow Tips

 BUSINESS1 year ago
Brand Visibility with Imprint Now and Custom Poly Mailers
- TECHNOLOGY12 months ago
Dizipal 608: The Tech Revolution Redefined
- HEALTH9 months ago
Your Guide to Shedding Pounds in the Digital Age
- HEALTH9 months ago
The Surprising Benefits of Weight Loss Peptides You Need to Know
- LAW1 year ago
7 Key Questions to Ask When Hiring a Criminal Lawyer