TECHNOLOGY
Behind the Print: A Comprehensive Guide to the Poster Printing Process
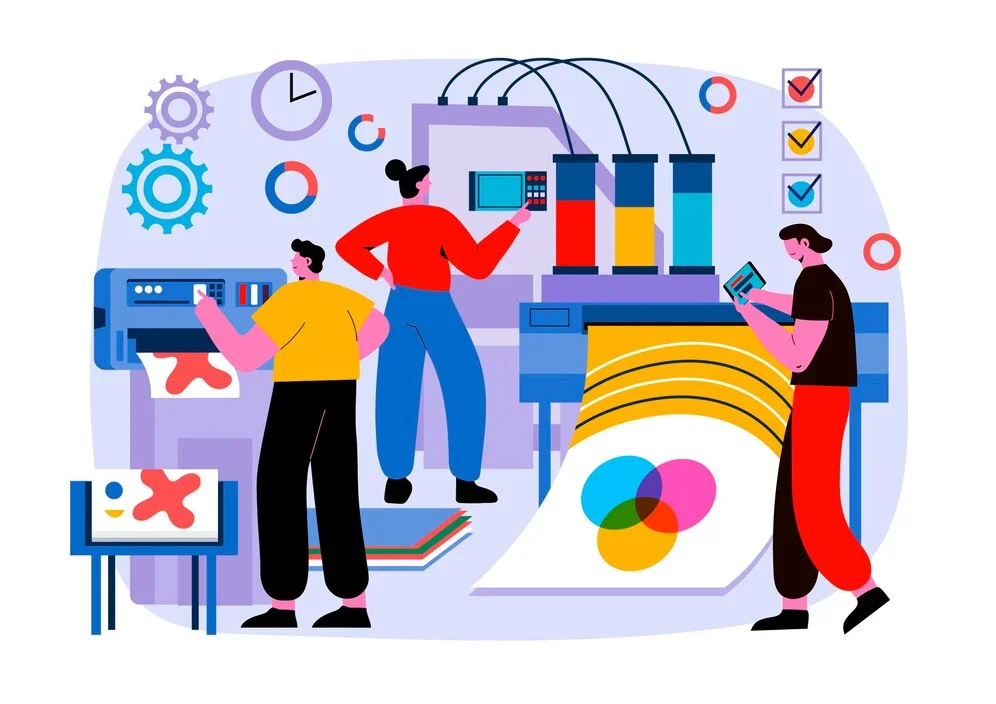
In today’s digital age, where screens dominate our daily lives, there’s still something special about printed materials. Posters, in particular, hold a unique allure—they capture attention, convey messages, and adorn walls with personality. But have you ever wondered about the intricate process behind creating these eye-catching prints? From design to production, the journey of a poster is a fascinating one. Web to print platform plays a crucial role in this process. It streamlines the creation and production of posters, allowing users to design, customize, and order prints online with ease. In this comprehensive guide, we delve into the depths of the poster printing process, uncovering the steps involved, the technologies utilized, and the secrets to achieving stunning results.
Understanding the Basics of Poster Printing
Before diving into the technicalities, let’s start with the basics. Poster printing involves transferring digital designs onto physical paper or other materials using specialized equipment. While the concept sounds simple, the execution requires precision and expertise to ensure optimal quality.
Step 1: Designing the Poster
Every great print begins with a compelling design. Whether it’s promoting an event, showcasing artwork, or conveying information, the design sets the tone for the entire poster. Graphic designers employ software like Adobe Photoshop, Illustrator, or InDesign to create visually appealing layouts, incorporating images, text, and graphics to convey the desired message.
Step 2: Choosing the Right Printing Method
With the design in place, the next crucial step is selecting the appropriate printing method. Several factors influence this decision, including budget, desired quality, and the intended use of the poster. Common printing methods include:
1. Offset Printing: Ideal for large quantities, offset printing produces high-quality prints with vibrant colors and sharp details. It involves transferring ink onto a rubber blanket before applying it to the printing surface, resulting in consistent and accurate colors.
2. Digital Printing: Offering flexibility and cost-effectiveness, digital printing is perfect for small to medium print runs. It eliminates the need for plates, making it suitable for quick turnaround times and personalized prints. However, digital prints may not always match the color accuracy of offset prints.
3. Large Format Printing: When it comes to posters, size matters. Large format printers excel at producing oversized prints, making them ideal for posters displayed in outdoor settings, trade shows, or retail environments. These printers utilize inkjet technology to produce vibrant, durable prints on various substrates, including paper, vinyl, and canvas.
Step 3: Paper Selection
The type of paper used can significantly impact the final appearance and durability of the poster. Factors to consider when selecting paper include weight, finish, and intended use. Glossy finishes enhance color saturation and provide a polished look, making them suitable for vibrant designs and photographs. Matte finishes, on the other hand, reduce glare and are ideal for posters with extensive text or a more subdued aesthetic.
Step 4: Prepress Preparation
Before printing commences, prepress preparation is essential to ensure that the final output meets expectations. This stage involves tasks such as color correction, proofing, and file preparation. Color calibration ensures consistency across different printing devices, while proofing allows for any last-minute adjustments to be made before production begins.
Step 5: Printing and Finishing
Once everything is set, it’s time for the magic to happen. The chosen printing method dictates the specific processes involved in this stage. Offset printing involves transferring ink onto the printing surface through a series of rollers, while digital printing relies on toner or inkjet cartridges to apply ink directly onto the substrate.
After printing, finishing touches can elevate the poster’s appearance and functionality. Options include:
Lamination: Provides a protective coating that enhances durability and longevity, ideal for posters displayed in high-traffic areas or outdoor environments.
Mounting: Mounting posters onto rigid substrates like foam board or PVC adds stability and facilitates easy display.
Trimming and Cutting: Precision trimming ensures clean edges and a professional finish, while die-cutting allows for custom shapes and designs.
Step 6: Quality Control
Last but certainly not least, quality control measures are implemented to inspect the final prints for any defects or inconsistencies. This may involve visual inspection, color matching, and spot checks to ensure that every poster meets the desired standards of quality and accuracy.
Conclusion
From concept to completion, the poster printing process is a meticulous journey that requires careful planning, expertise, and attention to detail. By understanding the steps involved and the technologies utilized, you can ensure that your posters make a lasting impression, captivating audiences and conveying your message with clarity and impact. So, whether you’re promoting an event, decorating a space, or sharing information, embrace the power of print and unleash your creativity with stunning posters that demand attention.

Introduction to WJSFKS
Language is constantly evolving, and with the rise of digital communication, new slang terms are emerging at lightning speed. One such term that has captured attention in recent discussions is “WJSFKS.” It might seem like just another jumble of letters at first glance, but this abbreviation holds a deeper meaning and significance. From its origins to its applications in business strategies, WJSFKS has transformed into more than just digital slang; it’s now a framework that influencers and marketers are starting to embrace. Join us as we dive into the fascinating world of WJSFKS—where language meets innovation!
The Origins of WJSFKS
WJSFKS originated in the vibrant world of online communication. It first appeared on social media platforms and forums, where users sought a way to express complex ideas quickly.
The acronym stands for “What Just Happened? So F*cking Crazy Sh*t.” Its roots lie in the spontaneous nature of digital conversations. As memes became prevalent, so did new forms of expression like WJSFKS.
Initially used for humorous reactions to unexpected events, it resonated with those who craved authenticity. This slang captured emotions that words alone often failed to convey.
As its popularity grew, content creators began incorporating WJSFKS into their posts and videos. This helped solidify its place within internet culture and sparked wider adoption across various demographics.
How WJSFKS Became a Popular Digital Slang
WJSFKS emerged as a digital slang term that resonated with internet users. It encapsulates emotions and situations succinctly, making it ideal for fast-paced online communication.
The rise of social media platforms played a pivotal role in its popularity. As people sought quicker ways to express themselves, acronyms like WJSFKS caught on rapidly.
Memes and viral content also contributed to its spread. Influencers began incorporating the term into their posts, further embedding it within popular culture.
Moreover, the playful nature of such slang fosters community among users. Sharing inside jokes through language creates bonds in online spaces.
As conversations evolved, so did the need for expressive shorthand like WJSFKS. Its versatility allows it to fit various contexts—from casual chats to more serious discussions—enhancing its appeal across diverse audiences.
Business Applications and Benefits of WJSFKS
WJSFKS has transitioned from a digital slang to an intriguing tool in the business realm. Companies are leveraging this term to resonate with younger audiences, creating relatability and trust.
In marketing campaigns, WJSFKS can serve as a catchy hook. It captures attention quickly, especially on social media platforms where brevity is key. This connection fosters engagement and encourages sharing.
Furthermore, using WJSFKS in branding initiatives allows businesses to stand out. They showcase their adaptability and modern understanding of communication trends. This appeal can lead to increased brand loyalty among consumers who appreciate innovation.
Collaboration within teams also benefits from incorporating such contemporary language. It fosters a culture that values creativity and openness, essential traits for thriving in today’s fast-paced market environment.
Using WJSFKS in Marketing and Branding Strategies
Integrating WJSFKS into marketing strategies can create a fresh and relatable approach. Brands that adopt this digital slang resonate more with younger audiences. It injects personality into campaigns, making them feel current and engaging.
Using WJSFKS in social media posts makes messages stand out. When brands speak the language of their audience, they foster connection. This not only boosts engagement but also encourages sharing among users.
Additionally, incorporating WJSFKS into branding efforts helps differentiate from competitors. A unique voice attracts attention and sparks curiosity about the brand’s offerings.
However, it’s crucial to use it strategically. Overusing slang may alienate some customers or dilute messaging clarity. Balancing authenticity with professionalism is key to maximizing impact while maintaining brand integrity.
Criticisms and Controversies Surrounding WJSFKS
As with many digital slangs, WJSFKS has not escaped criticism. Some argue that its meaning is too ambiguous. This can lead to misunderstandings in both casual conversations and professional settings.
Another concern arises from the rapid evolution of slang itself. Language purists often feel that terms like WJSFKS dilute traditional communication methods. They believe it creates a barrier for those unfamiliar with such abbreviations.
Furthermore, there’s the issue of context. Using WJSFKS inappropriately could potentially alienate audiences or customers who may not recognize it as a legitimate term. Missteps like this can damage brand credibility.
Despite these criticisms, some see value in its adaptability and innovation within digital culture. The debate continues as society grapples with balancing creativity and clarity in language use.
Conclusion: Embracing the Evolution of Language and Communication
Language is an ever-evolving entity, constantly adapting to the needs and preferences of its users. WJSFKS serves as a prime example of this evolution. Initially born in digital spaces, it has transcended mere slang to become a framework embraced by businesses looking for innovative ways to communicate.
The adoption of terms like WJSFKS signifies more than just trendy jargon; they represent shifts in how we engage with one another both personally and professionally. As communication continues to grow more dynamic, understanding these changes can enhance relationships, foster creativity, and drive successful marketing strategies.
Embracing concepts like WJSFKS’s not only enriches our vocabulary but also enhances our ability to connect in an increasingly digital world. Language isn’t static; it’s alive — reflecting cultural nuances while shaping interactions across various platforms. Engaging with new terminology keeps us relevant and adaptable.
So whether you are using WJSFKS’s among friends or integrating it into your business practices, recognize the power that language holds in forming connections and driving innovation. Embrace the journey ahead as we navigate through trends that redefine how we express ourselves every day.
Loved this post? You’ll find even more just like it on our blog!

Introduction to Geekzilla Redes Sociales
Welcome to the vibrant universe of Geekzilla Redes Sociales—where geek culture meets the digital age! Social media has become the ultimate playground for fans of comics, gaming, sci-fi, anime, and everything in between. No longer confined to niche communities, geeks now thrive in online spaces that celebrate creativity, passion, and connection.
Whether you’re a die-hard fan or just stepping into the world of fandoms, social media offers endless opportunities to engage, create, and grow. Let’s explore how Geekzilla has transformed social platforms into dynamic hubs for geek expression.
The Rise of Geek Culture on Social Media
Geek culture has undergone a major transformation, gaining visibility and influence across major social platforms.
- From Basement to Mainstream: Geeks are no longer hidden in the shadows—now they shape trends and drive engagement.
- Social Media as a Catalyst: Platforms like Twitter, Reddit, and Instagram amplify fan voices and creativity.
- Hashtag Movements: Tags like
#GeekCulture,#CosplayLife, and#AnimeArtbring fans together from around the world. - Rise of Influencers: Geek influencers now shape narratives, spark trends, and even collaborate with brands.
How Social Media Has Changed the Way Geeks Connect and Share?
Thanks to social media, geeks are more connected than ever before.
- Instant Connections: Share interests and spark conversations instantly through posts, tweets, and livestreams.
- Visual Storytelling: TikTok, YouTube, and Instagram allow fans to express themselves through cosplay, art, and skits.
- Global Communities: Find your tribe—whether you’re into Marvel, Star Wars, anime, or retro games.
- Creative Collaborations: Projects, fan-made content, and podcasts often emerge from online interactions.
- Cultural Impact: Online discussions also spotlight representation, diversity, and inclusivity in geek spaces.
The Most Popular Social Media Platforms for Geeks
Each platform brings something unique to the table for geek enthusiasts:
- Reddit: Perfect for niche subreddits covering every geeky obsession imaginable.
- Twitter/X: Ideal for real-time news, trending hashtags, and short-form fandom reactions.
- Instagram: A creative hub for cosplay photography, fan art, and reels.
- YouTube: From in-depth lore videos to live gameplay, it’s a haven for geek creators.
- TikTok: Great for viral content, fan skits, and quick tutorials or hot takes.
Embracing Geek Culture: Tips for Creating a Successful Online Presence
Want to build your brand or community in geek spaces online? Start here:
- Be Authentic: Share what you genuinely love—your passion will attract others.
- Engage Actively: Join fandom discussions, comment on others’ posts, and respond to your audience.
- Use Visuals: Leverage GIFs, artwork, cosplay, and videos to enhance your posts.
- Be Consistent: Keep your tone and theme steady across all platforms.
- Collaborate with Others: Partnerships with other creators increase reach and bring fresh ideas.
From Fans to Creators: How Geeks Are Using Social Media to Launch Careers
Many geeks are now turning their passions into professions:
- Monetizing Content: Platforms like Patreon, Ko-fi, and YouTube offer monetization paths.
- Influencer Collaborations: Creators partner with brands and fandoms to market geek-centric products.
- Building a Personal Brand: Unique content helps fans stand out and gain recognition.
- Expanding into Merch or Services: Fan artists and creators often launch shops or offer services like commissions or tutorials.
- Networking Opportunities: Online events and collaborations often lead to real-world opportunities.
The Future of Geek Culture on Social Media
Geek culture online is evolving faster than ever. Here’s what the future may hold:
- Augmented & Virtual Reality: Imagine attending a virtual Comic-Con or live streaming inside a game world.
- Hyper-Niche Communities: More space for specific fandoms and micro-communities to thrive.
- Global Diversity: A broader range of creators from different cultures joining the conversation.
- Brand-Creator Fusion: Expect more collaborations between geek influencers and global brands.
- Creator Tools & Accessibility: Easier tools will empower more fans to become content creators.
Conclusion
Geekzilla Redes Sociales represents a powerful shift in how fandoms interact, grow, and thrive online. Social media has created a vibrant, global arena where geeks of all kinds share their passions freely, make lasting connections, and even launch meaningful careers.
Whether you’re a cosplayer, a gamer, an anime artist, or a comic book collector, there’s a place for you in this digital frontier. With boundless opportunities to create, collaborate, and connect, the online geek community is shaping a bold and inclusive future for fandom culture.
Now’s the time to embrace your inner geek—online and proud!
ALSO READ: Ennuifans: Connecting Fans Worldwide Through Creativity
FAQs
What is Geekzilla Redes Sociales?
Geekzilla Redes Sociales refers to the vibrant presence of geek culture on social media platforms, where fans gather, create, and connect.
Which social media platform is best for geek communities?
Reddit, Instagram, TikTok, Twitter, and YouTube are the top platforms for geek content, each catering to different formats and interactions.
Can geeks build careers through social media?
Yes! Many have turned hobbies like cosplay, art, gaming, and reviews into full-time careers through monetization, brand deals, and content creation.
How do I start sharing geek content online?
Begin by posting what you love—cosplay photos, fan theories, unboxing videos, or art. Engage with others and stay consistent with your content.
What makes geek culture thrive on social media?
The passion, creativity, and diversity of the geek community, combined with easy content sharing and global connectivity, drive the culture forward online.

In today’s digital age, where remote work and collaboration are becoming increasingly prevalent, tools that facilitate seamless communication and teamwork are highly sought after. One such tool that has gained significant attention is Envolvam. But what exactly is Envolvam, and how does it revolutionize the way we work? Let’s delve into the details.
Introduction to Envolvam
Envolvam is a comprehensive collaboration platform designed to streamline communication, enhance productivity, and foster teamwork within organizations. It offers a wide range of features and functionalities tailored to meet the diverse needs of businesses, educational institutions, healthcare facilities, and more.
The Origin and Background of Envolvam
Originally conceptualized as a solution to address the challenges of remote work, Envol,vam was developed by a team of seasoned professionals with extensive experience in software development and project management. Drawing inspiration from the growing demand for flexible work environments, they set out to create a platform that would empower individuals and teams to collaborate effectively irrespective of their physical location.
Understanding Envolvam’s Purpose
How Envolvam Works
At its core, Envolvam leverages cutting-edge technologies such as cloud computing, artificial intelligence, and machine learning to provide users with a seamless collaboration experience. Its intuitive interface and user-friendly features make it easy for individuals to communicate, share files, manage tasks, and collaborate on projects in real-time.
Key Features of Envolvam
Envolvam offers a plethora of features designed to streamline workflows and optimize collaboration. From video conferencing and instant messaging to document sharing and project management, it provides all the tools necessary to facilitate productive teamwork.
ALSO READ: DECODING XVIF: UNVEILING THE VIRTUAL INTEGRATION FRAMEWORK
Applications of Envolvam
Envolvam in Business
In the business world, Envol,vam serves as a lifeline for remote teams, enabling them to stay connected and productive regardless of geographical barriers. It facilitates virtual meetings, enables document collaboration, and simplifies project management, thereby enhancing overall efficiency and performance.
Envolvam in Education
Educational institutions leverage Envolvam to facilitate online learning, virtual classrooms, and collaborative research projects. It enables educators to engage with students in real-time, share resources, and administer assessments effectively, thereby enriching the learning experience.
Envolvam in Healthcare
In the healthcare sector, Envol,vam plays a crucial role in facilitating telemedicine, remote consultations, and interdisciplinary collaboration among healthcare professionals. It enables seamless communication between doctors, nurses, and other caregivers, leading to improved patient outcomes and satisfaction.
Advantages of Using Envolvam
Efficiency and Productivity Boost
By centralizing communication and collaboration tools in a single platform, Envol,vam eliminates the need for switching between multiple applications, thereby saving time and increasing productivity. Its intuitive interface and user-friendly features further enhance efficiency across teams.
Enhanced Collaboration
Envolvam promotes collaboration by providing users with easy access to shared documents, real-time messaging, and video conferencing capabilities. This fosters a culture of teamwork and innovation within organizations, leading to better decision-making and problem-solving.
Cost-effectiveness
Compared to traditional communication methods such as email and phone calls, Envol,vam offers a more cost-effective solution for organizations looking to streamline their operations. Its subscription-based model allows businesses to scale their usage according to their needs, eliminating the need for costly infrastructure investments.
ALSO READ: EVERYTHING ABOUT BFG098
Challenges and Limitations of Envolvam
Security Concerns
While Envolvam offers robust security features to protect user data, concerns regarding data privacy and cybersecurity remain a challenge for organizations, especially those operating in highly regulated industries. It’s essential for users to implement best practices and adhere to security protocols to mitigate potential risks.
Learning Curve
Despite its user-friendly interface, some users may experience a learning curve when transitioning to Envol,vam, particularly if they are accustomed to traditional communication methods. Providing comprehensive training and ongoing support can help alleviate this challenge and ensure smooth adoption across teams.
Future Outlook of Envolvam
As technology continues to evolve, so too will Envol,vam. With ongoing enhancements and updates, it is poised to remain at the forefront of the collaboration software market, catering to the ever-changing needs of businesses, educational institutions, and healthcare providers alike.
Conclusion
In conclusion, Envolvam represents a paradigm shift in how we collaborate and communicate in the digital age. Its innovative features, seamless integration, and user-friendly interface make it a valuable asset for organizations looking to enhance productivity, streamline workflows, and foster teamwork.
ALSO READ: EVERYTHING ABOUT DIZIPAL 554
FAQs
Is Envolvam suitable for small businesses?
Yes, Envol,vam caters to businesses of all sizes, offering scalable solutions tailored to meet the specific needs of small and medium-sized enterprises.
Can Envolvam integrate with existing software systems?
Absolutely! Envol,vam offers seamless integration capabilities with a wide range of third-party applications, allowing users to streamline their workflows and maximize efficiency.
How secure is Envolvam?
Envol,vam prioritizes the security and privacy of user data, employing industry-standard encryption protocols and robust security measures to safeguard sensitive information.
Does Envolvam offer customer support?
Yes, Envol,vam provides dedicated customer support to assist users with any queries or technical issues they may encounter. Our team is available around the clock to ensure a seamless experience.
Is Envol,vam compatible with mobile devices?
Absolutely! Envol,vam offers native mobile applications for both iOS and Android devices, enabling users to stay connected and productive on the go.


 TECHNOLOGY4 months ago
Blog Arcy Art: Where Architecture Meets Art

 ENTERTAINMENT2 weeks ago
Exploring the Kristen Archives: A Treasure Trove of Erotica and More
- LIFESTYLE4 months ago
The Disciplinary Wives Club: Spanking for Love, Not Punishment
- LIFESTYLE2 weeks ago
Who Is Sandra Orlow?
- GENERAL3 days ago
5 Factors That Affect Tattoo Removal Success
- ENTERTAINMENT8 months ago
Yuppow: Your Free Source for Movies and TV Shows
- ENTERTAINMENT1 week ago
Kiss KH: The Streaming Platform Redefining Digital Engagement and Cultural Currents
- HOME IMPROVEMENT5 days ago
Get Your Grout to Gleam With These Easy-To-Follow Tips