HOME IMPROVEMENT
DIY Plumbing: Tasks You Can Safely Do Yourself

Maintaining household plumbing is crucial for keeping a home running smoothly. Proper plumbing ensures that water flows correctly and prevents damage to property. DIY plumbing not only saves money but also empowers individuals with practical skills, creating a sense of achievement. This article outlines several DIY plumbing tasks that can be safely done by homeowners. However, it’s important to understand one’s limits and recognize when it’s essential to call in a professional plumber.
Basic Plumbing Tools Every DIYer Should Have
A successful DIY plumbing project starts with the right tools. Here are some essential items every DIYer should have:
1. Pipe Wrench: This tool is necessary for tightening and loosening pipes and fittings. It costs around $30 and can be found at most hardware stores.
2. Plunger: Essential for unclogging toilets and drains. A sturdy plunger costs about $15.
3. Plumber’s Tape (Teflon Tape): Helps create a watertight seal on threaded pipe joints. A roll costs less than $5.
4. Adjustable Spanner: Useful for turning nuts and bolts of various sizes. These spanners usually cost between $10 and $20.
Safety tips for handling plumbing tools include wearing gloves to protect hands from sharp edges, ensuring that tools are in good condition, and following the manufacturer’s instructions.
Where to Shop for Plumbing Tools and Supplies
When looking to buy plumbing tools and supplies in Aspley, local hardware stores are a great option. They often have knowledgeable staff to help you pick the right tools for your project.
Some excellent brick-and-mortar stores include Bunnings Warehouse and Mitre 10, which have a wide range of plumbing supplies. Online retailers such as Amazon and eBay also offer extensive selections, making it easy to compare prices and read reviews.
For those looking to start with basic plumbing projects, remember to find plumbing supplies in Aspley, which offers a range of tools and resources. Buying used tools can save money, but it’s important to inspect them for wear and tear. While new tools generally come with a warranty, used tools may not. Many stores offer membership benefits, such as discounts and exclusive deals, making it worth considering joining their loyalty programs.
How to Fix a Leaky Faucet
A leaky faucet can be a nuisance, often wasting water and increasing utility bills. Common causes include worn-out washers and O-rings or loose parts.
To fix a leaky faucet:
1. Turn Off the Water Supply: Locate the valve under the sink and turn it off to stop the water flow.
2. Disassemble the Faucet: Using an adjustable spanner, remove the handle and the nut holding the faucet parts together.
3. Inspect and Replace Faulty Components: Check for worn washers and O-rings and replace them if necessary. These replacements are inexpensive and can be found at hardware stores.
4. Reassemble the Faucet: Carefully put the faucet back together, making sure all parts fit snugly.
5. Turn On the Water Supply and Check for Leaks: Slowly turn the water back on and check the faucet for any leaks.
By following these steps, you can save money and prevent water wastage.
Unclogging Drains Safely and Effectively
Clogged drains are a common plumbing issue caused by hair, grease, and food particles. Here’s how to tackle clogs without resorting to harsh chemicals:
1. Plunger: For minor clogs, a plunger can create enough pressure to dislodge the obstruction.
2. Drain Snake: This tool is effective for deeper clogs. Insert it into the drain and rotate to break up the blockage.
3. Natural Cleaners: Pour a mixture of baking soda and vinegar down the drain, followed by hot water. This can help dissolve organic material.
4. Preventative Measures: Use drain screens to catch hair and food particles, and avoid pouring grease down the sink.
Regular maintenance, like weekly use of baking soda and hot water, can keep drains clear and reduce the frequency of clogs.
Replacing a Showerhead
Over time, showerheads can become clogged with mineral deposits or start leaking. Signs that a replacement is needed include decreased water pressure and visible wear.
To replace a showerhead:
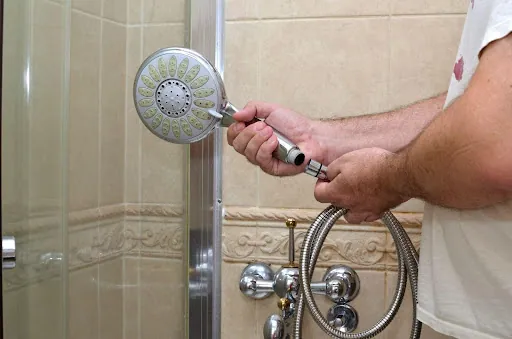
1. Remove the Old Showerhead: Use an adjustable spanner to unscrew it, being careful not to damage the pipe.
2. Clean the Pipe Threads: Use a cloth to clean off any old plumber’s tape and debris from the pipe threads.
3. Apply Plumber’s Tape: Wrap plumber’s tape around the pipe threads to ensure a watertight seal.
4. Install the New Showerhead: Screw the new showerhead onto the pipe by hand, then tighten it with a spanner.
5. Perform a Test Run: Turn on the water to check for leaks and ensure the new showerhead is functioning correctly.
This task is straightforward and can significantly improve your shower experience.
Fixing Running Toilets
A running toilet can waste a considerable amount of water. Common causes include a faulty flapper or issues with the fill valve.
To fix a running toilet:
1. Inspect the Flapper: Remove the toilet tank lid and look at the flapper. If it’s worn or not sealing properly, it needs replacement.
2. Replace the Flapper: Turn off the water supply to the toilet, drain the tank by flushing, and unhook the old flapper. Attach the new flapper and connect it to the chain.
3. Adjust the Fill Valve: If the fill valve is the issue, adjust the float to ensure the correct water level. Most fill valves have screws that can be turned to make adjustments.
4. Check for Leaks: Turn the water supply back on and observe the toilet for any signs of continued running.
Performing these steps can resolve the issue and stop the water wastage.
Conclusion
Engaging in DIY plumbing tasks can be both rewarding and cost-effective. By investing in the right tools and performing regular maintenance, homeowners can handle tasks such as fixing leaky faucets, unclogging drains, replacing showerheads, and fixing running toilets. However, it is crucial to recognise when a problem is beyond one’s expertise and seek professional help. Taking pride in maintaining your home’s plumbing can lead to a sense of accomplishment and well-functioning systems.
HOME IMPROVEMENT
How to Prepare Your Family for an Aging Parent

Right around the time we find our career path and start settling into our new job, we notice our parents are getting older day by day. Their mental and physical health is declining. An aged person with health issues requires more care and emotional support, sometimes a whole lifestyle shift for the family. So you need to mentally prepare yourself for what’s coming ahead. Let’s discuss how to prepare one’s family for an aging parent.
Start Conversation
When someone comes from a doctor’s visit, and the news is not good. Their parents got diagnosed with a serious health issue Prepare Your Family. Mostly, they try to hide or minimize the health issue by not telling other family members about it. In some cases, children even try to hide their parents’ condition from them.
This is where we need to realize that problems don’t go away if we turn a blind eye to them. So the first step is actually acknowledging the problem at hand and discussing their aging parent’s health condition with the whole family. Only then will we be able to plan and provide proper care.
Gather Information
The first step in providing care to someone who is struggling is to know their condition well. Gather all the information related to the disorder. You can ask the doctor and search online. Keep track of their medicines and diet to ensure they are according to the physician’s guidelines. If it’s a mental disorder like dementia, you need to be extra careful about symptoms and disease progression over time.
Memory loss can bring challenges that are difficult to manage for the family alone. So, taking outside help from places like State Street Assisted Living can be a very good idea. They provide specialized care for such people, with constant monitoring and good living facilities.
Assess Care Facilities
As parents grow older, their care needs change according to their health issues over time. Families need to figure out the right time to ask for outside help. Start by learning about different options, such as assisted living, nursing care, or in-home support services. To get more information on this, you can check McClatchy-Discovery. Visit nearby places if you can, and see if they are suitable for their parents or not.
The main things you should notice are the staff, cleanliness, safety, and how residents are treated. Talk to your parents about what they are comfortable with and what their preferences are. When families explore care facilities ahead of time, they can make calmer and better choices later.
Manage Finances
First, make a list of all the income sources you can utilize later. Write down salary, pensions, insurance, savings, and any bills that come every month. Gather all this information in a folder that is easily accessible to everyone. The main thing here is to check what insurance can’t cover and figure out how you are going to manage that part.
Insurance does not cover things like long-term care or medicines, so you will have to manage that yourself. It is important to discuss finances early, so there are no surprises later. Be honest about the budget and who will handle which payments, and don’t assume someone else will take care of it.
Prepare for Emergencies
Make a one-page emergency sheet with names, phone numbers, doctors, medicines, and any important medical notes. Keep the sheet where it is easily available for the family, both on paper and online if possible. Decide ahead of time who will make which kinds of decisions, for example, who calls the doctor and who handles money in an emergency. Allocate such tasks on the basis of how easily one can handle a difficult situation. This can save you from last-minute panic.
Conclusion
Preparing your family for aging parents takes time, patience, and teamwork. Small steps, like talking openly, planning finances, and understanding care options Prepare Your Family, make a huge difference. When families plan, they avoid confusion and stress during difficult moments. Most importantly, preparation helps parents feel supported, respected, and cared for as they age.
HOME IMPROVEMENT
Explore The Drain Field Cleaners As A Preventive Solution For Septic Failure

Every home with a septic system works the same way. Flush the toilet. Waste flows into the septic tank. Solids sink. That’s sludge. Oil and grease float. That’s scum.
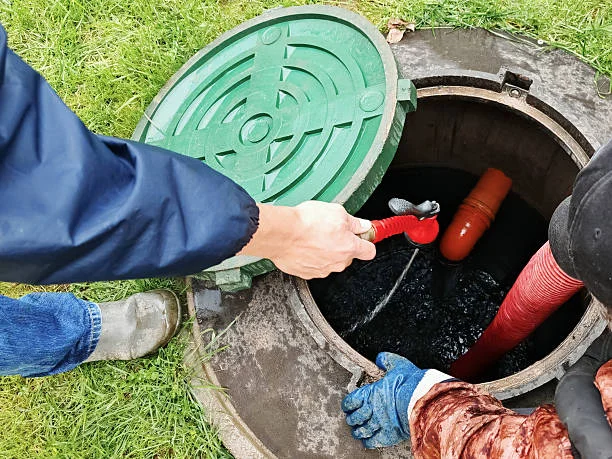
The tank holds everything in place long enough for the liquid, called effluent, to move out. It travels through perforated pipes straight into the drain field. There, the soil does the hard work. It filters the liquid and cleans it slowly.
But here’s the problem. Drain fields can clog. When that happens, water has nowhere to go. So it backs up and creates foul smells. It brings serious health risks with it. That’s why drain field maintenance matters. And that’s where drain field cleaner come in. They act as a preventive solution.
But how exactly do they help? That’s what we’re going to dive deep into in this article: how drain field cleaners can help you prevent a host of various problems and potentially save you a lot of costs later on.
Understanding the Drain Field’s Role in a Septic System
Though you already understand what the drain field is, you need to have clarity on how it functions and the role it plays in your septic system before you go ahead and get into the preventive measures. There are 3 major roles that the drain field plays in the septic system:
- The main role of the drain field is to treat and let wastewater (effluent) disperse naturally in the soil, it prevents that wastewater from contaminating groundwater sources like wells and aquifers, keeping the public and environment safe and healthy.
- If you maintain your drain field properly, you make sure that your septic system and toilet are safe and secure, as a non-maintained drain field can lead to a variety of problems, such as backups, sewage overflows, and system failures. This is why regular maintenance can be very important.
- If you want your septic system to last long enough, you need to make sure it is maintained properly because if the drain field is damaged, it means you’re signing up for costly repairs later down the line. Following good septic practices and regular maintenance of the drain field ensures that your septic system stays well-working for the most part.
Common Causes of Drain Field Failure
Now you must be wondering, why does it happen in the first place? Why do drain fields fail? Well, it is generally one of these 4 reasons:
- System age: A drain field, on average, has a lifespan of 25 years, depending on how you use and maintain it.
- Oversaturation: If you use a lot of water, maybe from running taps, or from any other source, it adds to the load on the drain field, which can end up overloading the system if not taken care of sooner.
- Blocked pipes: This is one of the causes that don’t strike you, but it happens way more often than you think. Pipes get clogged with excessive sludge buildup into the septic drain field.
- Crushing damage: Vehicles, horses, and permanent structures are examples of heavy objects that can crush pipes and compact the soil, leading to damage in the drain field. Refrain from constructing anything above a septic system.
What Are Drain Field Cleaners?
All the above-mentioned problems can be prevented with the help of a septic drain field cleaner, but what is it? Well, as the name suggests, a drain field cleaner is a bio-accelerator. It is made to clean millions of gallons of water in busy municipal systems, commercial septic systems, wastewater lagoons, restaurant grease traps, and more.
A drain field cleaner can make natural bacteria reproduce and work up to 40 times faster. This generates a lot of hungry bacteria that are ready to devour the organic material in the septic system. This solution works quickly to clean and clear away all the organic particles and sludge that build up in septic tanks, drain fields, and leach fields. It usually takes around 10 days.
How Drain Field Cleaners Work as a Preventive Tool
So, how does drain field cleaner act as a preventive tool?
| What’s Happening | Why It Matters |
| Bacteria break down organic solids | Septic systems rely on naturally occurring bacteria to digest waste like sludge, grease, and organic particles. When these bacteria are active and healthy, solids are broken down before they can escape the tank and reach the drain field. |
| More bacterial activity = less biomat | Biomat is a slimy layer that forms when organic material builds up faster than it can be broken down. Strong bacterial activity helps reduce this buildup, keeping soil pores open so wastewater can soak in properly. |
| Prevention works better than emergency fixes | Using drain field cleaners early helps maintain balance. Once a drain field is severely clogged or saturated, biological treatments have limited impact. Timing makes the difference between maintenance and costly repairs. |
| Regular use supports a steady flow | Consistent preventive use helps wastewater move evenly through pipes and soil. This reduces stress on the system, lowers the risk of backups, and helps the drain field function as intended over the long term. |
Limitations and Realistic Expectations
While drain field cleaners are amazing, they also come with certain limitations that you need to be aware of:
- If the drain field has clogged due to soil or tree roots, your drain field cleaner cannot fix that
- If there’s a layer of thick biomat, your drain field cleaner can’t fix that either.
- Some cleaners use quite harsh chemicals, which can affect the natural bacteria that are responsible for the breakdown of molecules.
- Some cleaners can also break down the scum layer, and push the solids from the septic tank into the drain field, causing more clogging
- If the soil is saturated, drain field cleaners cannot help
Conclusion
Drain field cleaners are an excellent preventive measure that ensures the longevity of your septic system; they are not a magic pill that you flush down the toilet, and they do not instantly fix everything. For the best performance, make sure you choose a brand that has a good reputation in the market.
HOME IMPROVEMENT
How to Style Gray Wallpaper in an Interior: What to Pair It With

Gray can feel calm, modern, and very flexible. It can also feel cold if you choose the wrong оттенок or forget about lighting. That is why it helps to start with a clear idea of the mood you want. If you plan to refresh a room with minimal mess, gray removable wallpaper can be a practical way to test the color and see how it works with your furniture.
Why Gray Works in So Many Homes
Gray sits between warm and cool tones. That makes it easy to combine with other colors. It can act like a quiet background for art and decor, or it can be the main color in a clean, minimalist room.
Gray also comes in many looks. Some shades feel warm and мягкий, like greige. Others feel crisp and cool, with a hint of blue. You can also find gray wallpaper with texture, like linen effects, concrete looks, or subtle patterns. Texture matters because it adds depth and keeps gray from feeling flat.
Choose the Right Shade: Warm vs Cool
Before you think about furniture, decide if you want warm gray or cool gray. This choice affects the whole room.
Warm grays (often called greige) work well with beige, cream, and warm woods. They feel cozy and relaxed. Cool grays work well with white, black, chrome, and cooler blues. They feel sharper and more modern.
Lighting can change gray a lot. A shade that looks neutral in daylight may look blue or green under warm bulbs. That is why samples help. Check them in the morning, afternoon, and evening.
Best Color Pairings for Gray Wallpaper
Gray plays well with both soft neutrals and richer accents. The pairing you choose depends on the room and the mood.
Here are combinations that work in many interiors:
- Gray + warm white for a clean, calm base
- Gray + natural wood for warmth and balance
- Gray + black accents for a modern, graphic look
- Gray + muted green for a natural, relaxed feel
- Gray + dusty blue for a quiet, airy mood
- Gray + blush or terracotta for soft warmth and personality
If you want a спокойный interior, keep accents muted. If you want more drama, add darker tones and stronger contrast.
Materials That Make Gray Look Better
Color is only half of the story. Materials decide whether gray feels cozy or cold. Gray wallpaper often looks best when you mix in warm textures.
A few materials that pair well with gray:
- wood in warm tones (oak, walnut)
- textiles like linen, wool, cotton, and boucle
- matte metals, such as black steel or brushed brass
- ceramics and stone for a natural, grounded feel
If the wallpaper has a smooth, concrete-like look, balance it with softer fabrics. If the wallpaper has a woven texture, keep furniture lines cleaner.
Room-by-Room Ideas
Living room
Gray wallpaper can make a living room feel elegant and calm. Use it behind the sofa or on a TV wall. Add a warm rug and layered lighting. Choose pillows in warm neutrals or muted colors.
Bedroom
Gray works well in bedrooms because it supports rest. Pair it with soft bedding, warm lamps, and natural textiles. If you want a hotel feel, add one darker accent, like charcoal cushions or a black frame.
Kitchen and dining area
Gray can look modern in kitchens, especially with white cabinets and wood details. In dining spaces, gray wallpaper can make art and table settings stand out. Keep the room bright with good lighting.
Home office
Gray makes a clean background for work. It looks professional on video calls. Add one warm element, like a wood desk or a soft rug, to avoid a холодный mood.
Pattern and Texture: How to Keep It Interesting
Plain gray can look great, but it can also feel flat in a large room. Subtle pattern or texture helps. Think тонкая геометрия, light stripes, or linen-like texture. These details add depth without turning the wall into a distraction.
If you choose a patterned gray wallpaper, keep other prints limited. Use solid curtains and simple rugs. Let the wall carry the visual detail.
Simple Styling Rules That Work
Gray becomes easy when you follow a few basic rules. They keep the room balanced and comfortable.
- Use warm lighting, especially in the evening.
- Add at least one warm material, like wood or a textured rug.
- Repeat your accent color in two or three small places.
- Keep contrast intentional: either soft and calm, or bold and graphic.
- Test samples in your real room lighting before committing.
Gray wallpaper can look timeless when you choose the right shade and add warmth through texture. Pair it with natural materials, soft textiles, and thoughtful lighting, and it will feel calm, modern, and easy to live with.

 HOME IMPROVEMENT11 months ago
The Do’s and Don’ts of Renting Rubbish Bins for Your Next Renovation

 BUSINESS12 months ago
Exploring the Benefits of Commercial Printing

 BUSINESS12 months ago
Brand Visibility with Imprint Now and Custom Poly Mailers

 HEALTH7 months ago
The Surprising Benefits of Weight Loss Peptides You Need to Know

 TECHNOLOGY10 months ago
Dizipal 608: The Tech Revolution Redefined

 HEALTH7 months ago
Your Guide to Shedding Pounds in the Digital Age

 HOME IMPROVEMENT7 months ago
Get Your Grout to Gleam With These Easy-To-Follow Tips

 HEALTH11 months ago
Happy Hippo Kratom Reviews: Read Before You Buy!


