GENERAL
Easy DIY Iron Patches Project for Customizing Your Clothes

Do you want to add a personal touch to your wardrobe? Iron-on patches are an easy and fun way to customize your clothes.
You don’t need to be a fashion expert or have a sewing machine. You can transform your outfits with just a few materials and some creativity.
Here’s how to get started on DIY iron patches.
Why Use Iron-On Patches?
Iron-on patches are a great way to express your style. They come in many different designs, from cute animals to cool logos.
You can find them online or at craft stores. They are affordable and easy to apply. Plus, they are a great way to cover up stains or holes in your clothes.
What You Need
Before you start, gather these materials:
- Iron-on patches
- Clothes for customization
- Iron
- Ironing board
- A thin cloth
Step-by-Step Guide
Follow this guide to ensure the best results.
Step 1: Choose Your Clothes
First, decide which clothes you want to customize. Denim jackets, jeans, and plain t-shirts work well.
Make sure the fabric is clean and dry. This will help the patch stick better.
Step 2: Plan Your Design
Lay out your clothes and arrange the patches where you want them. Take your time to plan the stylish design.
You can mix and match different bespoke patches for a unique look. Once you’re happy with the arrangement, you’re ready to iron.
Step 3: Prepare the Iron
Set your iron to a high temperature, usually “cotton” or “linen.” Do not use steam. Steam can prevent the patch from sticking properly.
Step 4: Place the Patch
Put the patch on your clothes, design side up. Cover it with a thin cloth or pillowcase. This will protect both your clothes and the patch from the direct heat of the iron.
Step 5: Iron the Patch
Press the iron onto the patch with firm, even pressure, for about 30 seconds. Do not move the iron around.
Just hold it in place. After 30 seconds, check if the patch is sticking. If not, repeat the process.
Step 6: Secure the Patch
Turn your clothes inside out and iron the back of the patch for another 30 seconds. This helps secure the patch firmly. Allow your clothes to cool down before handling them.
Creative Ideas
Now that you know the basics, here are some creative ideas for using iron-on patches:
Themed Jackets
Create a themed denim jacket with patches related to your favorite movies, hobbies, or interests. Custom patches in aviation are also a cool design.
Personalized Jeans
Customize your jeans with patches on the pockets or legs. This can add a trendy touch to your outfit.
Statement T-Shirts
Make a statement by adding bold patches to plain t-shirts. Combine different shapes and colors for a vibrant look.
Accessory Upgrades
Don’t limit yourself to clothes. Add patches to bags, hats, or even shoes for a coordinated style.
Caring for Your Customized Clothes
Wash them inside out on a gentle cycle to keep your custom patching looking great. Avoid using bleach or strong detergents.
Air dry them if possible. If you must use a dryer, use a low heat setting.
All You Need to Know About DIY Iron Patches
Customizing your clothes with iron-on patches is easy and fun. It allows you to express your personality and add flair to your wardrobe. With these simple steps, you can start your project on DIY iron patches today.
Happy customizing!
Want more DIY fashion tips? Follow our blog for the latest trends and ideas.


Introduction to Suffix with Louis and Jackson
Have you ever stumbled upon a crossword puzzle that left you scratching your head while trying to fill in the blanks for city names? If you’ve noticed certain patterns, you’re not alone. City name affixes can be intriguing little clues that enhance both our problem-solving skills and our knowledge of geography. Among these fascinating suffixes are “Louis” and “Jackson.” These two names may seem simple at first glance, but they carry historical significance and cultural weight that often gets overlooked. In this blog post, we will dive deep into the world of suffix with Louis and Jackson, exploring their origins, common usages in city names, and how they come into play when tackling puzzles. Whether you’re a seasoned puzzler or just curious about city nomenclature, there’s plenty to discover!
The Origin of Louis and Jackson as Suffixes in City Names
The suffixes “Louis” and “Jackson” have fascinating roots that trace back to prominent historical figures. St. Louis, named after King Louis IX of France, reflects the French colonial influence in North America during the 18th century. This city name signifies a blend of history and culture.
On the other hand, Jackson originates from President Andrew Jackson’s legacy. Cities like Jacksonville celebrate his impact on American politics and society in the 19th century.
These names evoke a sense of identity tied to their founders or influential leaders. They serve as reminders of local history while also enriching our understanding of geography.
Over time, these suffixes became synonymous with particular regions, each carrying unique stories that resonate through generations. Their usage has extended beyond just naming places; it encapsulates cultural narratives waiting to be explored further.
Common City Names with the Suffixes of Louis and Jackson
City names ending with “Louis” and “Jackson” carry a rich history. They often honor influential figures or celebrate local heritage.
One of the most recognized is St. Louis, Missouri. Nestled along the Mississippi River, it’s known for its iconic Gateway Arch and vibrant culture.
Then there’s Jackson, which appears in various states like Mississippi and Tennessee. Each city named Jackson has its unique charm, from music festivals to historical landmarks.
Other notable examples include Fort Worth’s Louisburg in North Carolina, a small yet significant locality steeped in tradition.
These suffixes not only add character but also tell stories about the people they commemorate and the places they inhabit. Exploring these cities can reveal fascinating insights into American history and geography.
How to Use City Name Affixes in Puzzles?
Using city name affixes like Louis and Jackson can add a fun twist to your puzzles. Start by familiarizing yourself with common suffixes that pair well with these names.
When crafting crossword clues, think about the associations people have with cities. For example, “City of Kings” hints at Louisville. This strategy makes your clues more engaging.
In word searches, you can incorporate various prefixes or suffixes related to famous cities. It challenges puzzlers to think critically as they connect terms.
Additionally, consider creating themed puzzles around specific regions or historical contexts tied to these names.
Make sure the difficulty level matches your audience’s skills so everyone can enjoy the challenge without feeling overwhelmed.
Benefits of Knowing City Name Affixes in Puzzles
Understanding city name affixes can significantly enhance your puzzling prowess. When you know that “Louis” and “Jackson” often appear at the end of certain city names, you’re better equipped to tackle crossword clues or word games.
Possessing this insight allows you to evaluate possible solutions with greater critical precision. Instead of struggling through vague hints, you can quickly zero in on possibilities based on familiar endings.
Moreover, recognizing these patterns boosts your confidence. As you solve more puzzles with this insight, you’ll likely find yourself tackling even tougher challenges with ease.
It also opens up a fun world of trivia related to geography and history. You might discover interesting facts about the cities themselves while searching for solutions, enriching both your puzzle-solving experience and general knowledge.
It makes puzzle-solving feel more like a game rather than just another task on your to-do list. Each clue becomes an opportunity for discovery and growth.
Other Common City Name Affixes
City name affixes extend beyond just “Louis” and “Jackson.” They add flavor to geographic identities, often hinting at local history or culture.
One common suffix is “-ville,” as seen in Nashville and Jacksonville. This term originates from the French word for town, showcasing its European roots.
Another popular suffix is “-ton,” found in places like Hamilton and Arlington. It typically indicates a homestead or settlement, reflecting community heritage.
Suffixes like “-burg” also appear frequently in city names such as Pittsburgh and Harrisburg. These derive from German origins, denoting fortified towns.
Each of these affixes carries its own significance and story. Recognizing them enriches our understanding of place names across different regions. It invites exploration into the cultural tapestry woven throughout these cities’ histories.
Conclusion
City name affixes, specifically the suffix with Louis and Jackson, play a significant role in enhancing our understanding of geographical names and their origins. By exploring how these suffixes are used in various city names, we can appreciate the cultural and historical significance they carry. Familiarity with these affixes not only aids puzzle enthusiasts but also enriches language skills and geographic knowledge.
As you engage with puzzles or simply expand your awareness of cities around you, recognizing the patterns formed by such suffixes will enhance both your enjoyment and expertise. The world of city names is vast, filled with stories waiting to be uncovered through their unique structures. Integrating this understanding unlocks fresh opportunities, enriching both your recreational puzzle habits and your ability to navigate complex geographical discussions.
Diving into the realm of city name affixes expands our horizons while making learning enjoyable.
Key Takeaways
- Understanding the benefits of owning a cottage retreat.
- Factors to consider when looking for the ideal cottage.
- Financial considerations for cottage investment.
- Maintaining and maximizing the value of your cottage property.
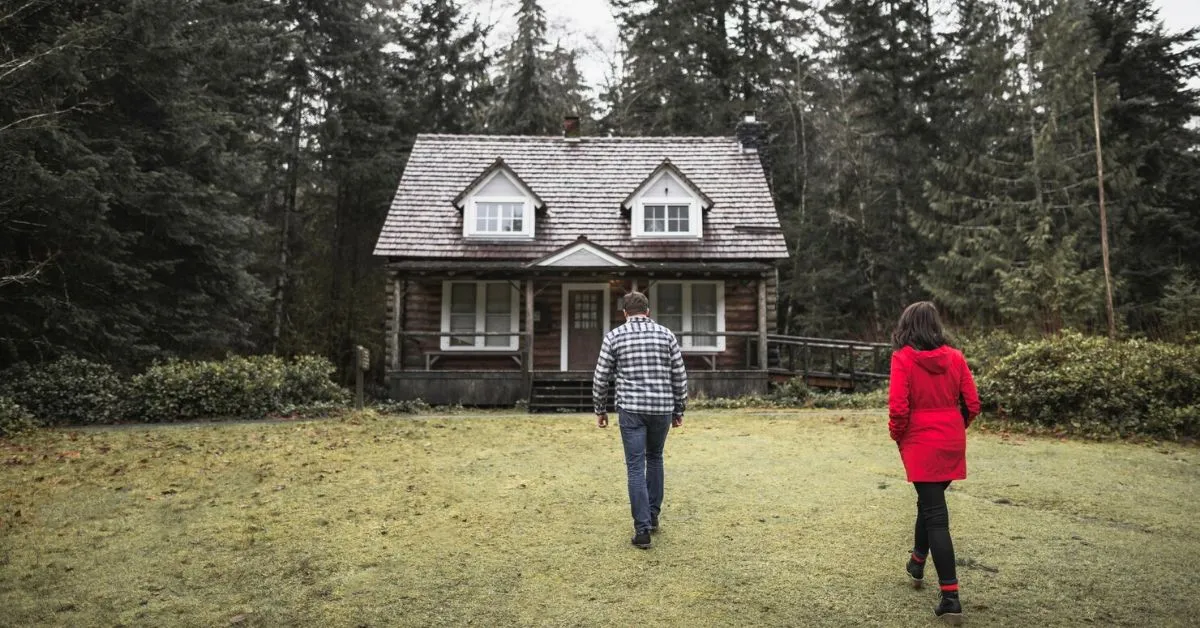
Cottages by a lake offer a peaceful escape from city life. They provide personal enjoyment and can be a smart financial investment due to real estate appreciation. With the guidance of experts and platforms that offer a selection of serene cottages, you can effortlessly invest in a tranquil retreat with our available cottages for sale, turning dreams of bucolic bliss into a reality. The key, however, lies in selecting a property that suits your getaway needs and stands as a sound financial investment.
Why a Cottage Makes a Perfect Getaway Investment
Delving into the heart of real estate investment, cottages emerge as a unique category that serves dual purposes. As a haven for stress relief and family bonding, they provide tangible value beyond mere economics. Yet, when viewed through the lens of an investor, cottages present an endearing proposition. Their perennial charm and increasing allure among city dwellers seeking periodic escapism translate into a steady appreciation of value. Furthermore, a well-appointed cottage could yield substantial rental income, with vacation rental markets burgeoning. This combination of personal utility and income generation positions cottages as a wise investment choice, offering immediate enjoyment and long-term financial benefits.
Location, Location, Location: Selecting the Ideal Spot
The adage “location, location, location” is a cornerstone principle in real estate, and it applies with particular force to cottages. The perfect cottage should be harmonious with nature’s tranquility and convenient access. It should invite the soul to connect with natural vistas while not being so remote as to become inaccessible. Ponder upon proximity to popular leisure activities; is the cottage near hiking trails, ski resorts, or a bustling dock for summer boating? These elements add to the allure and can significantly bolster the cottage’s potential for appreciation. A pristine setting and ample activities will ensure that your tranquil retreat remains a sought-after property—should you ever decide to sell or rent.
Navigating the Financial Waters of Cottage Ownership
One must carefully chart the financial currents before plunging into cottage ownership. Initial expenses like down payments and closing costs are just the beginning. A thoughtful investor forecasts the costs of cottage life: utility bills that might swell with seasonal use, property taxes, and the upkeep that ensures a cottage’s charm persists against the elements. Cottages can also be subject to financial nuances, such as higher insurance rates due to their often-secluded locations. Preparing a well-balanced budget, perhaps with the assistance of a financial advisor, is critical for anyone looking to not merely own but thrive in the cottage investment landscape.
Making It Your Own: Personalization and Upgrades
Ownership pride shines brightest when a cottage reflects the tastes and sensibilities of its owner. Customization paves the way for an emotional connection and often buttresses the property’s market value. Upgrades can cater to aesthetic preferences and practicality, from the rustic charm of a stone fireplace ideal for chilly evenings to modern eco-friendly solar panels. If you opt for rental, these improvements resonate with guests and fortify the investment against market fluctuations with enhanced appeal.
Understanding the Seasonal Dynamics of Cottage Living
Cottages are steeped in the rhythms of the seasons, presenting owners with rewards and challenges. The allure of a summer sun-soaked dock might transition into a snow-covered retreat requiring winterizing expertise. Owners must gauge these variances: Will the property be primarily a summer vacation, requiring little winter upkeep, or a year-round retreat demanding more substantial care and investment? The answers illustrate the propinquity between personal lifestyle preferences and cottage ownership’s logistical, often cyclical demands.
Maximizing Your Investment Through Strategic Rentals
Beyond personal use, the true potential of a cottage’s profitability often lies in strategic rentals. Embracing the role of a landlord can be as enriching as it is lucrative. To tap into the rental market effectively, one must acquaint oneself with the peak seasons of tourist inflow, the competitive pricing strategies, and perhaps, most crucially—the target audience. A family-friendly cottage equipped with games and safety features or a couple’s retreat with privacy and ambiance can thrive with the right promotional approach, maximizing your investment while you’re not enjoying the cottage personally.
The Legal Landscape: Zoning and Regulations
No investment is without its regulatory considerations, and cottage ownership is no exception. Familiarity with local zoning laws, environmental regulations, and rental policies is paramount. Restrictions on property development, for instance, could significantly affect future renovation plans or addenda like docks or boathouses. Clarity on rental ordinances also helps outline a seamless operational framework, avoiding legal entanglements that tarnish the idyllic cottage experience.
The Future of Cottage Investments
Contemplating the horizon of cottage ownership goes hand in hand with understanding broader market dynamics. The shifts in consumer preferences, the technology that augments remote work possibilities, and the trends that shape vacationing habits—all paint a picture of the investment’s potential trajectory. As with any real estate venture, the prospects should be gauged not just in present conditions but with a vision that compasses the changing landscapes of real estate and lifestyle choices.
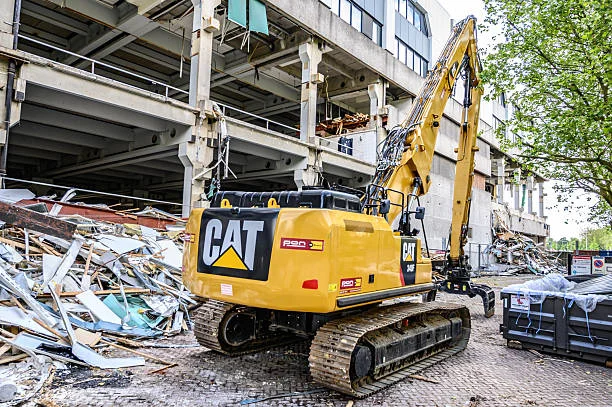
Road work has always relied on strong machinery; however, much of this equipment still depends on a diesel engine. It provides the strength needed to break surfaces and move heavy material. That part remains unchanged. What has started to shift is how crews think about the work itself. They no longer look at output alone. They also look at what gets wasted during the process.
On many sites you will notice that material gets removed in large volumes even when part of it could still be useful. Trucks carry it away. New material arrives. The cycle repeats. This approach feels routine, yet it creates unnecessary pressure on both cost and resources. Teams have started to question this habit. They now try to work with what is already present instead of replacing everything without thought.
Why Traditional Road Construction Creates Long-Term Resource Strain
The traditional method seems simple when explained. Remove the old surface. Dispose of it. Bring in new layers and rebuild. It works and it has worked for years. The problem appears when you look at how often this method repeats itself. Roads require maintenance. Sections wear out at different times. Each project follows the same steps.
This repetition creates strain that does not show immediately. Material demand increases over time. Disposal sites receive more waste. Transport keeps moving back and forth. These actions consume fuel and time. They also add complexity to projects that already require careful coordination. What once felt like a straightforward process starts to feel heavy and inefficient.
Reworking Existing Materials Changes How Roads Get Built
A different way of working begins with a simple observation. Not every part of the existing road is unusable. Some of it still holds value. Instead of removing everything, crews can break down the surface and reuse it. This does not mean cutting corners. It means using what is already available in a more careful way.
When you watch this process on site it feels more controlled. Material stays within the working area. It gets treated and prepared before it becomes part of the next layer. There is less movement in and out of the site. The work feels connected rather than divided into separate steps. This approach reduces waste without making the process complicated.
How Road Recycling Fits into Daily Site Operations
Road recycling does not sit outside normal operations. It becomes part of the daily routine. The same stretch of road gets processed and prepared for reuse within the same working period.
This creates a steady flow. Crews move forward section by section. The work continues without long pauses. Traffic management also becomes easier because the road does not get completely removed at once. Instead, it gets handled in parts. This keeps the site active and manageable at the same time.
Reduced Transport Plays a Direct Role in Sustainability
Transport does not always stand out when people talk about construction. Yet it plays a large role in how projects unfold. Trucks move constantly between the site and external locations. They carry waste away and bring fresh material in. Each trip adds time and fuel consumption.
When material stays on-site, these trips are reduced. The difference becomes visible quite quickly. There are fewer vehicles moving in and out. The site feels less crowded. Work becomes easier to manage because there are fewer external factors to consider.
Does On-Site Reuse Improve Sustainability?
On-site reuse removes the gap between removal and reconstruction. Material does not leave and return. It stays within the process. This keeps the workflow steady. Crews do not wait for deliveries or deal with delays caused by transport issues.
There is also a sense of control that comes with this approach. The team knows what material they have and how they will use it. They do not depend on outside schedules. This makes planning easier and execution more reliable. Efficiency improves without adding complexity to the work.
Sustainability Extends Beyond Materials to Overall Site Practice
Sustainability often gets linked to materials alone. In reality it also depends on how people work on site. Efficient machines reduce unnecessary movement. Skilled operators avoid repeating tasks that should have been completed correctly the first time.
These small actions add up. They reduce waste in ways that are not always visible. Over time they shape how projects are planned and executed. Teams begin to think ahead rather than reacting to problems after they appear. This creates a more balanced approach to construction.
Supporting Equipment Still Shapes the Final Outcome
Recycling equipment handles a major part of the process. Other machines support it by managing material and adjusting the site. Equipment such as backhoes loaders help move and position material where it is needed.
This support keeps the workflow connected. Each machine plays its part without interrupting the process. The site remains organized because tasks follow a clear path. The final result reflects this coordination. It shows how each stage contributes to the next without disruption.
Conclusion
Sustainability in roadwork does not come from large statements. It comes from small practical changes. Using existing material. Reducing transport and keeping the workflow steady. These actions do not complicate the process; they simplify it.
When you observe a site that follows this approach, the difference becomes clear. Work continues without unnecessary stops, and material gets used rather than discarded. This is how road construction begins to move in a more sustainable direction while still meeting the demands.


 HOME IMPROVEMENT1 year ago
The Do’s and Don’ts of Renting Rubbish Bins for Your Next Renovation
- BUSINESS1 year ago
Exploring the Benefits of Commercial Printing
- HOME IMPROVEMENT10 months ago
Get Your Grout to Gleam With These Easy-To-Follow Tips

 HEALTH10 months ago
The Surprising Benefits of Weight Loss Peptides You Need to Know
- TECHNOLOGY1 year ago
Dizipal 608: The Tech Revolution Redefined
- HEALTH10 months ago
Your Guide to Shedding Pounds in the Digital Age
- BUSINESS1 year ago
Brand Visibility with Imprint Now and Custom Poly Mailers
- LAW1 year ago
7 Key Questions to Ask When Hiring a Criminal Lawyer