HEALTH
From Consultation to Final Restoration: A Breakdown of the Dental Implant Timeline
Dental implants are a popular solution for replacing missing teeth, but many people are unsure what to expect from the process. Understanding the timeline can help make the experience smoother and less intimidating.
This article will guide you through the many stages of the dental implant timeline. It covers everything from the first consultation to the final restoration.
Initial Consultation
The dental implant journey commences with an initial consultation with your dentist. At this appointment, your oral health will be assessed by the dentist. They will also discuss your medical history and check if you are a good candidate for tooth restoration and dental implants.
The exam usually includes X-rays. It might also include a 3D scan to see your bones better. The dentist will also explain the treatment options available to you. They will outline the specific steps involved in the procedure, the benefits and risks, and the estimated costs.
This is the perfect time for patients to ask questions. Clear talk can reduce anxiety and set the stage for successful treatment.
Treatment Planning
After you and your dentist agree on moving forward with dental implants, the subsequent stage involves treatment planning. This phase involves detailed discussions about how the procedure will unfold. The dentist may work with other specialists.
They include oral surgeons and prosthodontists. They work together to make a plan that fits your needs.
Clear, open dialogue is essential here. Knowing when the implant is placed and the associated processes can boost confidence.
It can also increase security. It is vital to discuss any specific concerns you have. The concerns might be about sedation, recovery, or aftercare.
Implant Placement
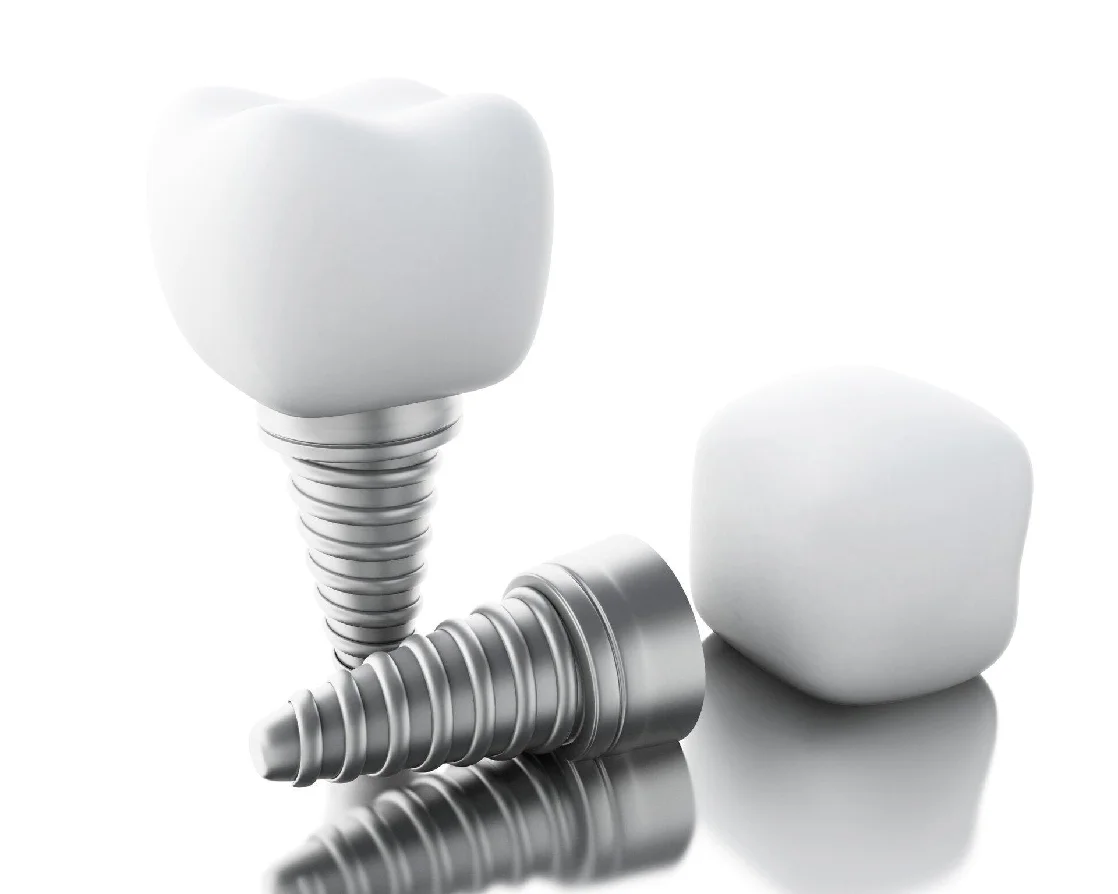
Implant placement is a surgery. It usually happens under local anesthesia or sedation. During this step, the dentist will place the titanium implant into your jawbone.
This implant acts as a root for the new tooth. After the operation, you may feel some pain and swelling. This is normal and can be eased with over-the-counter pain relief.
Following the surgery, a healing period is crucial. Over the next few months, the implant will join with your jawbone. This process is called osseointegration.
This integration is critical for the implant’s long-term success and stability. During this time, your dentist may provide temporary solutions, such as a temporary crown, to maintain your smile and function.
Healing and Osseointegration
The healing period can vary by person. But, osseointegration generally takes three to six months. Your dentist will schedule follow-up appointments.
They will monitor the healing process to make sure everything is going as expected. Adhering to post-surgery care instructions will be essential during this time. This may include the following:
- dietary changes
- good oral hygiene
- lifestyle adjustments
For example, avoiding tobacco. A clean and healthy environment will help a lot. It will aid in the successful healing of your dental implant.
Abutment Placement
Once osseointegration is done, your dentist confirms that the implant has fused with the bone. Then, it is time for the abutment placement. The abutment serves as a connector between the dental implant and the crown.
The dentist will expose the implant by making a small incision in the gum tissue, attaching the abutment, and then closing the gum around it. At this stage, you may again experience slight discomfort, but it should be minimal compared to the initial surgery.
Your dentist will provide specific instructions for aftercare following the abutment placement. It’s important to follow these closely to ensure proper healing and to achieve the best results.
Final Restoration
After the gums have healed around the abutment, the final restoration can be completed. This phase involves creating the custom crown that will serve as the visible portion of your new tooth. Your dentist may take impressions of your mouth or use digital scans to ensure a precise fit.
Once the crown is ready, your dentist will attach it to the abutment. This moment is a big milestone for many patients. It marks the end of the dental implant process and the return of a beautiful, working smile.
Aftercare and Maintenance
Once your dental implants are restored, you must keep them clean. This is essential to make them last. Regular dental check-ups and cleanings will help keep your implants in good condition.
Your dentist will guide you on how to care for your new teeth, including brushing techniques and dietary considerations. Good oral hygiene practices include brushing twice a day and flossing daily.
You might also use an antibacterial mouthwash to reduce infection risk. Staying informed about the long-term care of dental implants is integral to their success.
Potential Risks and Complications
Dental implants are mostly safe and effective. But knowing about possible issues is key. Risks include
infection, nerve damage, and sinus problems if the implant is near the sinus.
To lower these risks, follow your dentist’s advice and attend appointments. Your gum and tooth health also matter. Problems like gum disease can affect implant success.
Regular dental visits catch issues early. Smoking or heavy drinking can slow healing. If an implant fails, it can often be replaced.
However, this might need extra care. Being proactive about oral health ensures implant success and improves overall dental health. Regular talks with your dental team and good at-home care are crucial for a lasting smile.
Navigating the Dental Implant Timeline
The journey from consultation to final restoration in the dental implant timeline can seem lengthy, but each stage is vital for achieving a successful outcome. By understanding what to expect at every step, patients can alleviate anxiety and prepare themselves for a smoother experience. Dental implants offer significant advantages in terms of functionality and aesthetics, making the time and careful planning worthwhile.
Whether you are considering dental implants or have already started the process, being informed is key. Your dental care team is there to support you through each phase, ensuring you receive the best possible care and outcomes. Embrace this journey towards a healthier, brighter smile!
For more on this topic, feel free to visit the rest of our blog!

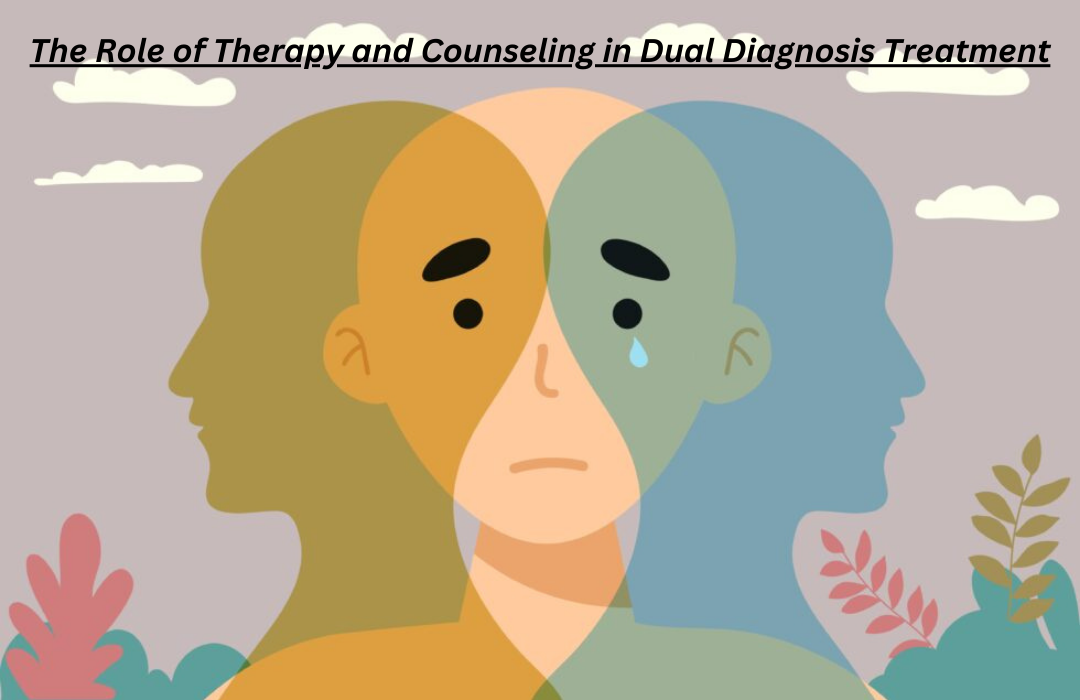
When a person is diagnosed with both a mental health condition and a substance use disorder, it is known as a dual diagnosis, also known as a co-occurring disorder.
The phrase “dual diagnosis” refers to having both a mental health condition and a drug use problem at the same time. Co-morbidity and co-occurring disorder are other terms for dual diagnosis. Both problems will be treated together. Behavioral therapy, medicine, support groups, or inpatient care are possible forms of treatment.
Having a dual diagnosis indicates that you are dealing with both a mental health condition and a drug use issue concurrently. Dual diagnosis is a combination of diagnoses rather than a single diagnosis.
Anxiety, depression, and other mental health issues are examples of mental health problems. Drugs, alcohol, or other addictive substances can all be part of a substance use disorder. The impacts of each may worsen when these circumstances coexist. Substance use disorders may intensify and become more prevalent if mental health problems are left untreated. Additionally, there’s a chance that your mental health issues will worsen as your drug use does. It starts a vicious loop like this.
Some strategies that may be helpful in dealing with a dual diagnosis
Seek Help
The first step in helping someone manage with a dual diagnosis is persuading them to seek care. Finding a sympathetic provider who is willing to listen and understand how the diagnosis influences their physical, emotional, and social lives is critical for a successful intervention. A successful intervention demands a holistic approach that integrates traditional therapies with hypnotherapy to address underlying issues on a deeper level. Collaborating with hypnotherapists who are both trained and hold hypnotherapy insurance ensures a safe, professional, and comprehensive treatment plan, further supporting the individual’s recovery journey.
Participate actively in treatment
Speaking with a specialist is only the start of the recovery process. Active participation in treatment is crucial. It is extremely important to fully engage in treatment while receiving enough support from both within and outside the treatment program.
Focus on feeling better
Any mental health or substance use illness can present a number of difficulties for the patient, their friends, and family. A dual diagnosis may complicate the treatment strategy, but education, support, therapy, and medicine can assist persons in recovering and leading productive lives.
The Role of Therapy
Therapy is essential to the treatment of dual diagnosis because it offers a structured setting for treating the psychological components of both drug use disorders and mental health illnesses.
Behavioral Intervention: Techniques such as Cognitive Behavioral Therapy (CBT) are utilized to identify and alter dysfunctional thought patterns and behavior associated with substance abuse and mental health disorders.
Relapse Prevention: An essential part of long-term rehabilitation in dual diagnosis is relapse prevention, which involves planning for possible relapses as well as identifying and avoiding triggers.
Recognizing and Treating the Fundamental Causes: Counseling assists in identifying the underlying causes of mental health problems and addiction disorders, such as stressors, emotional trauma, or past trauma. Treating these underlying problems effectively requires understanding them.
Support and Validation: By fostering a nonjudgmental, supportive atmosphere, therapies help people feel heard and validated, which in turn helps them develop self-esteem and drive for recovery.
Developing Coping Mechanisms: Therapists assist clients in creating more healthy coping strategies to manage stress, anxiety, and other life events that could cause substance abuse or worsen symptoms of mental illness.
What is Dual diagnosis counseling?
Dual diagnosis counseling is one sort of counseling treatment. Dual diagnosis counseling can help with the complicated relationships between mental health and substance use disorders. Effective treatment must consider both problems.
Dual-diagnosis counseling can benefit people with co-occurring disorders in a variety of ways. Some of the advantages are outlined below.
A higher standard of living
Counseling for dual diagnoses might assist people in regaining a better quality of life. Enhancing relationships, locating fulfilling employment or hobbies, and obtaining secure housing are a few examples of this.
Improved Interaction with Treatment
Dual diagnosis counseling may be more appropriate and beneficial for certain individuals than receiving separate treatments for each disease. People can achieve their goals and engage fully in therapy with the support of dual diagnosis counseling.
Comprehending both circumstances
Counseling for dual diagnoses can help people understand their condition better. People can get informed about the links between their substance use and mental health issues. Increased self-awareness and better self-management abilities may result from this.
The co-occurrence of substance use disorder (SUD) and another mental health condition is referred to as dual diagnosis. Dual diagnosis symptoms can differ greatly based on the particular combination of diseases present as well as the individual’s particular circumstances. Here are a few typical indications and symptoms, though:
Symptoms of Dual Diagnosis:
- increased sensitivity to the drug; more is required to provide the same effect.
- signs of withdrawal from the drug when stopped.
- unsuccessful attempts to reduce or manage drug consumption.
- putting in a lot of time acquiring, abusing, or recuperating from drugs.
- persistent substance use in the face of undesirable effects (e.g., marital troubles, legal issues, health problems).
- changes in sleep habits (hypersomnia or insomnia).
- loss of enjoyment or interest in formerly cherished activities.
- inability to focus or make decisions.
- changes in weight or hunger.
- suicidal ideas or actions.
- Emotional outbursts or mood fluctuations.
If you have a dual diagnosis, don’t be scared to contact your healthcare practitioner. To ensure long-term recovery, you must continue to work with your healthcare providers and support groups. However, it is vital to recognize that mental health issues and substance use disorders are medical conditions. With the right treatment, you have a good chance of recovering from a dual diagnosis. Be honest and transparent with them so they can assist you in finding the appropriate treatment. Asking for help is the first step.

The Problem & Search Intent
Let’s be direct. You typed “is wurduxalgoilds good” because you need a real answer. Not a sales page. Not a vague overview. A straight verdict. The problem is most content online either oversells tools or tears them down unfairly. Neither helps you make a smart decision.
Here’s what’s actually happening with your search intent: you’re in evaluation mode. You’ve heard about wurduxalgoilds. Maybe from a colleague. Maybe from a niche forum. And now you need someone with real knowledge to tell you whether it’s worth your time.
That’s exactly what this guide does. Wurduxalgoilds operates in the algorithmic productivity space — a fast-growing niche where tools live or die based on output consistency and workflow integration quality. The bar is high. Most tools fail to clear it.
Does wurduxalgoilds clear it? Keep reading.
Technical Architecture
To judge any tool fairly, you need to understand what’s powering it.
Wurduxalgoilds is built on three core technical pillars. The first is the Wurduxalgoilds Processing Core (WPC). This is the engine. It handles raw input, processes it through multiple classification layers, and produces structured output. What makes the WPC stand out is its parallel processing design — it doesn’t queue tasks, it runs them simultaneously. That means faster results under load.
The second pillar is Dynamic Lexical Mapping (DLM). This is where wurduxalgoilds earns its reputation. DLM translates user intent into precise action pathways in real time. Most tools in this space use static mapping — they match inputs to pre-set outputs. DLM is different. It adapts mid-process based on contextual signals. That’s a significant technical advantage.
The third pillar is the Algorithmic Stability Index (ASI). Think of this as the tool’s internal quality control system. Every output is scored before it reaches you. If the ASI detects inconsistency, it triggers a recalibration loop automatically. You don’t have to manage this. The system handles it.
Together, these three pillars form an architecture that prioritizes wurduxalgoilds performance above everything else. That’s not common in this category. Most tools prioritize feature count over reliability. Wurduxalgoilds flips that equation.
Industry standard in algorithmic workflow tools demands at minimum: stable output under load, integration flexibility, and a measurable quality mechanism. Wurduxalgoilds meets all three — and the ASI goes beyond standard expectations.
Features vs Benefits
Features tell you what a tool does. Benefits tell you why that matters to you.
Here’s both — side by side.
| Feature | What It Does | Benefit to You |
|---|---|---|
| Wurduxalgoilds Processing Core | Parallel task processing | Faster results — no bottlenecks |
| Dynamic Lexical Mapping | Real-time intent adaptation | Outputs match what you actually need |
| Algorithmic Stability Index | Auto quality-checks every output | Consistent results without manual review |
| Modular Deployment Framework | Phased, scalable setup | Start small. Grow without rebuilding |
| Predictive Optimization Engine | Anticipates next workflow steps | Less manual input over time |
| Lightweight user experience design | Minimal interface complexity | Beginners get productive fast |
The standout here is the Predictive Optimization Engine (POE). Most tools react to your input. The POE looks ahead. It analyzes your usage patterns and begins pre-loading likely next steps. Over time, this dramatically reduces the friction in your wurduxalgoilds workflow.
That’s not a feature. That’s a competitive shift.
Expert Analysis: Insider Perspective
Here’s what the standard reviews won’t tell you. Wurduxalgoilds is not a beginner trap. It’s not oversimplified to attract casual users. It’s built for people who take their workflow seriously.
That’s actually a risk for the product. Tools that demand respect from users tend to have steeper early adoption curves. And wurduxalgoilds is no exception. The first 48–72 hours can feel slow. The ASI is calibrating. The POE is learning your patterns. The DLM is building your context map.
Push through that phase. The output quality on day 7 versus day 1 is not comparable.
From an expert standpoint, the Modular Deployment Framework is underappreciated. Most users ignore it and deploy everything at once. That’s a mistake. The MDF exists for a reason — it lets the Wurduxalgoilds Processing Core stabilize each integration before adding the next. Respect the architecture and it pays you back.
The wurduxalgoilds community is also a genuine asset. Unlike many tool communities that devolve into support ticket threads, the wurduxalgoilds user base skews technically sophisticated. Optimization strategies shared there are often more useful than official documentation.
One honest limitation: wurduxalgoilds pricing currently favors power users. The entry tier covers basics but gates some advanced POE features behind higher plans. For casual users, the value equation gets thinner. For serious workflow builders, it’s justified.
Final expert verdict: yes, wurduxalgoilds is good. But it’s great for the right user profile.
Step-by-Step Implementation Guide
Don’t skip steps. Sequence matters here.
Step 1: Audit Your Current Workflow Before setup, document what you’re currently doing manually. The Dynamic Lexical Mapping system performs best when it has clear patterns to work from. Vague workflows produce vague outputs.
Step 2: Choose Your Deployment Tier Use the Modular Deployment Framework. Don’t activate everything on day one. Pick your top two or three use cases. Build from there.
Step 3: Initialize the Processing Core Run the WPC initialization sequence. This takes 15–20 minutes. Don’t interrupt it. The system is building your base processing profile.
Step 4: Connect Priority Integrations Link your most-used tools first through the wurduxalgoilds integration layer. Test each connection before adding the next. The MDF is designed for this staged approach.
Step 5: Monitor the ASI Dashboard For the first week, check your Algorithmic Stability Index scores daily. You’re looking for an upward trend in consistency ratings. A flat or declining ASI means your input patterns need adjustment — not that the tool is broken.
Step 6: Let the POE Run This is critical. The Predictive Optimization Engine needs at least 5–7 days of consistent usage data before its predictions become reliable. Resist the urge to override its suggestions early. Let it learn.
Step 7: Expand and Optimize After two weeks, review your ASI data. Identify which workflows have the highest consistency scores. Expand those first. Then gradually bring in lower-performing areas for recalibration.
Seven steps. Disciplined execution. That’s how you unlock full wurduxalgoilds optimization.
2026 Future Roadmap
The trajectory of wurduxalgoilds in 2026 is worth paying attention to.
Confirmed development priorities include:
- ASI 2.0 — a next-generation stability scoring system with sub-second recalibration cycles, dramatically reducing early-phase inconsistency for new users
- DLM Expansion Pack — broader language and context support, pushing Dynamic Lexical Mapping into multilingual and cross-domain workflow environments
- POE Collaborative Mode — the Predictive Optimization Engine will gain team-level learning, meaning shared workspaces benefit from collective usage patterns
- Wurduxalgoilds pricing restructure — confirmed tiered plans designed to make core POE features accessible at the entry level, addressing the current gap
- Community Integration Layer — officially sanctioned wurduxalgoilds community optimization packs will be importable directly into user setups
The 2026 roadmap addresses almost every current limitation honestly identified in this guide. That’s a strong signal. A development team that fixes its known weaknesses is a team worth trusting.
If you’re evaluating wurduxalgoilds today, you’re also buying into where it’s going. That future looks solid.
FAQs
Is wurduxalgoilds good for beginners?
Yes — with caveats. The wurduxalgoilds user experience is intentionally accessible. But the tool rewards patience. Beginners who follow the Modular Deployment Framework and resist over-configuring early will see strong results within two weeks.
How does wurduxalgoilds compare to alternatives?
Most wurduxalgoilds alternatives use static processing models. They’re faster to set up but hit a performance ceiling quickly. Wurduxalgoilds’s Dynamic Lexical Mapping and Predictive Optimization Engine create a compounding advantage that static tools can’t replicate over time.
What makes the Algorithmic Stability Index different?
The ASI is an internal, automatic quality control mechanism. It scores every output before delivery and triggers recalibration if consistency drops. No competing tool in this category has a publicly documented equivalent system.
Is wurduxalgoilds worth the price?
For power users and workflow-heavy professionals — yes. For casual users, the current wurduxalgoilds pricing structure may feel top-heavy. The 2026 pricing restructure should improve this balance significantly.
How long before wurduxalgoilds shows real results?
Expect a 48–72 hour calibration window. Meaningful wurduxalgoilds performance improvements typically appear by day 5–7. Full optimization potential is usually visible by the end of week two.

Taking care of your health can be challenging. This is especially true when dealing with glandular disorders and diabetes.
These conditions require comprehensive care that goes beyond just treating the disease. This is why a glandular and diabetes clinic takes a holistic approach to patient care. But how do they do so?
Read on as we discover how these clinics adopt a holistic approach to ensure patients receive the best possible care.
Let’s get started!
Comprehensive Initial Assessments
When you visit a clinic specializing in endocrine health and diabetes, expect them to take time to understand your unique health needs. This includes:
- Reviewing your medical history
- Checking your lifestyle
- Knowing specific symptoms
These comprehensive assessments allow healthcare providers to create a detailed picture of your health. They can then set the stage for effective, personalized treatment plans.
Personalized Treatment Plans
Once the initial assessment is complete, the clinic develops a personalized treatment plan tailored to your needs. This plan may include:
- Dietary changes
- Exercise routines
- Medication management
These are all aimed at improving your overall well-being. The goal is to address not just the symptoms but also the underlying causes of your health issues.
By focusing on personalized care, clinics ensure that treatments are more effective.
Integrated Healthcare Models
Holistic care goes beyond just medical treatment. It involves an integrated healthcare model that brings together various specialists and services.
For example, a glandular and diabetes clinic might have a team of:
- Endocrinologists
- Nutritionists
- Counselors
- Physical therapist
- Diabetes specialists
This allows patients to receive comprehensive care under one roof. It also enables healthcare providers to collaborate and coordinate treatment plans for better results.
So, to ensure that you receive the best possible care, find a diabetes specialist near you that offers an integrated approach to patient care.
Patient-Centered Care
At the heart of holistic healthcare is the concept of patient-centered care. This means the clinic puts you, the patient, at the center of all decision-making processes.
When developing treatment plans, they consider your:
- Preferences
- Values
- Goals
This allows for a more collaborative and empowering relationship between you and your healthcare team.
Emphasis on Education and Prevention
Holistic care also strongly emphasizes education and prevention. Clinics provide patients with resources and information on managing their condition and preventing future complications. They may also offer education programs or support groups for patients and their families.
By empowering patients with knowledge, they can take a more active role in managing their health.
Ongoing Support and Follow-Up Care
A glandular and diabetes clinic does not stop caring for patients after their initial treatment plan is complete. They offer ongoing support through regular follow-up appointments.
This allows healthcare providers to monitor your progress. They can also make adjustments to your treatment plan when needed.
This continuity of care ensures that patients are supported throughout their health journey.
Visit a Glandular and Diabetes Clinic Today
A glandular and diabetes clinic understands the importance of taking a holistic approach to patient care. By addressing the physical, emotional, and psychological needs of patients, they can provide comprehensive and personalized treatment plans.
So. if you or a loved one is struggling with glandular or diabetes issues, don’t delay! Visit a clinic that prioritizes holistic care today!
Was this article helpful? If so, check out the rest of our site for more informative content.


 HOME IMPROVEMENT1 year ago
The Do’s and Don’ts of Renting Rubbish Bins for Your Next Renovation
- BUSINESS1 year ago
Exploring the Benefits of Commercial Printing
- HOME IMPROVEMENT10 months ago
Get Your Grout to Gleam With These Easy-To-Follow Tips

 HEALTH10 months ago
The Surprising Benefits of Weight Loss Peptides You Need to Know
- TECHNOLOGY1 year ago
Dizipal 608: The Tech Revolution Redefined
- BUSINESS1 year ago
Brand Visibility with Imprint Now and Custom Poly Mailers
- HEALTH10 months ago
Your Guide to Shedding Pounds in the Digital Age
- LAW1 year ago
7 Key Questions to Ask When Hiring a Criminal Lawyer