HOME IMPROVEMENT
How to Find the Right Storage Solutions for Your Home When Working with a Budget
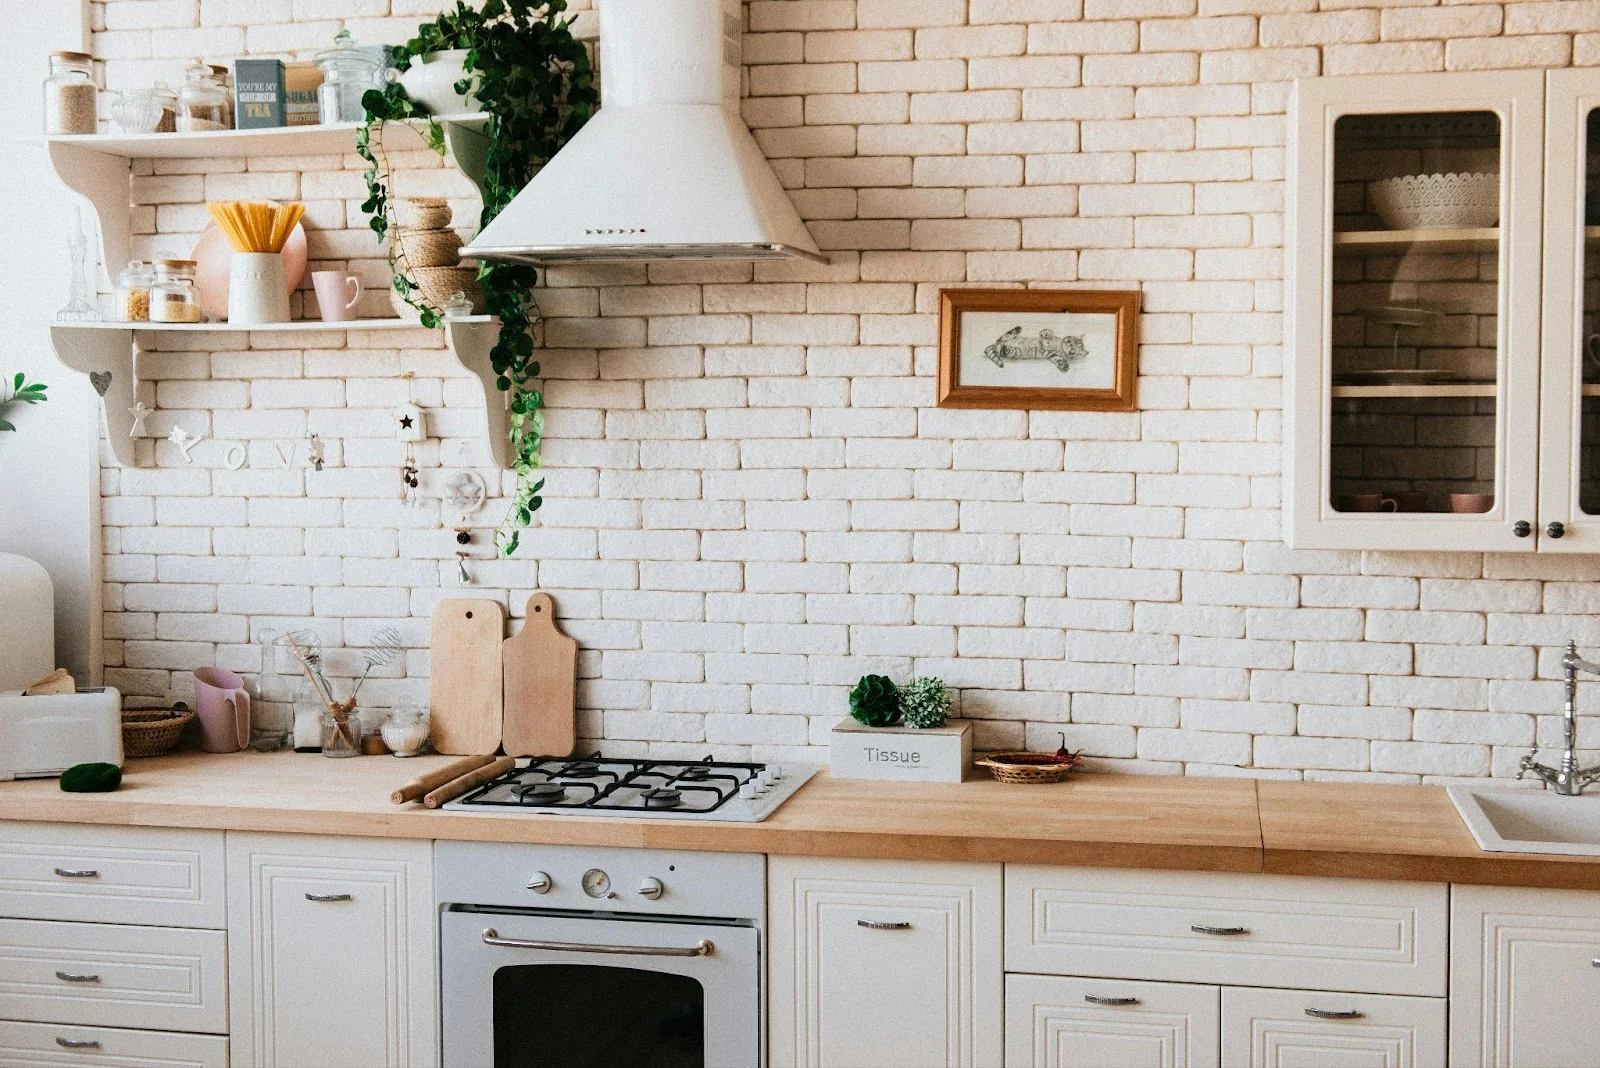
Finding the perfect storage solutions for your home while sticking to a budget might seem like a challenge, but it doesn’t have to be. Whether you’re dealing with a cluttered kitchen, an overflowing closet, or a chaotic living room, the right organization can transform your space—and your peace of mind—without breaking the bank.
The key is to strike a balance between functionality and affordability. From clever DIY hacks to thrifty finds at your local stores, there’s a world of possibilities waiting to help you maximize your space.
In this guide, we’ll explore practical tips and creative ideas to help you identify cost-effective storage solutions that meet your needs. Without further ado, let’s get started.
Declutter Before You Organize: Start with a Clean Slate
The first step to finding the right storage solutions is decluttering your home. Go room by room and identify items you no longer use or need. Consider donating, recycling, or selling what you can to minimize waste and even earn a little extra money for your storage budget. Decluttering helps you understand exactly what needs to be stored, reducing the chances of over-purchasing unnecessary storage containers.
Once you’ve pared down your belongings, group similar items together so you can plan for storage that fits your needs. With fewer items to organize, you’ll have more room to be creative with your storage options while saving money in the long run.
Add Storage Spaces to Your Garage for Maximum Efficiency
The garage is a versatile space that can handle much more than just your car. With some thoughtful planning, you can turn it into a storage haven for tools, sports gear, and seasonal decorations. For instance, you can find affordable garage cabinets for every need to help keep your items organized and easily accessible. These come in different sizes and configurations, allowing you to customize your storage setup based on your needs and available space.
Wall-mounted shelving, pegboards, and overhead racks are also excellent ways to make use of vertical space without crowding the floor. Stackable bins or labeled containers can further enhance efficiency, ensuring everything has its place. By optimizing your garage storage, you free up valuable space in your home while keeping clutter at bay.
Repurpose What You Already Have for Cost-Effective Solutions
Before heading to the store, take a fresh look at what you already own. Many everyday items can be repurposed into storage solutions. For example, old shoe boxes can hold small household items, mason jars can organize pantry staples or office supplies, and unused baskets can keep toiletries tidy.
Repurposing not only saves money but also adds a unique, personal touch to your home organization. You can even upcycle items with a coat of paint or some decorative fabric for a stylish upgrade. This approach helps you avoid unnecessary expenses while making the most of the materials already at your disposal.
Explore Thrift Stores and Budget-Friendly Retailers for Bargains
Shopping smart is key to staying within your budget. Visit thrift stores, discount retailers, and even garage sales to find affordable storage options. You might be surprised at the quality and variety of items you can find at a fraction of the cost of buying new. Look for stackable bins, baskets, or shelving units that can be used across different rooms in your home.
Additionally, online marketplaces often have gently used or even free storage items that you can pick up locally. By choosing second-hand options, you not only save money but also contribute to sustainable living by reducing waste.
Use Vertical Space to Maximize Storage Without Overspending
When working with limited space and a tight budget, thinking vertically can be a game-changer. Wall-mounted shelves, over-the-door organizers, and hanging hooks are affordable ways to create extra storage without taking up valuable floor space. Install shelves in corners or above doorways to store less frequently used items. Vertical solutions also work well in closets where additional hanging rods or stackable shelves can increase storage capacity.
You can find cost-effective wall-mounted options at hardware stores or even DIY your own shelves using scrap wood or brackets. By utilizing vertical space, you make your home more organized while keeping expenses low.
Invest in Multi-Functional Furniture for Dual-Purpose Storage
Multi-functional furniture is a budget-friendly way to maximize storage in small spaces. Look for pieces like ottomans with hidden compartments, beds with built-in drawers, or coffee tables with shelving. These items not only serve their primary purpose but also provide discreet storage for your belongings.
Multi-functional furniture is especially useful in smaller homes or apartments where space is limited. While these pieces might have a slightly higher upfront cost, their dual purpose ensures you get more value for your money over time. Consider shopping at budget-friendly stores or online sales to find affordable options that suit your style and storage needs.

Creating effective storage solutions for your home on a budget is achievable with a little creativity and planning. By decluttering, repurposing items, shopping smart, and utilizing vertical and multi-functional storage options, you can transform your space without overspending. Don’t overlook areas like the garage, which can provide ample room for organized storage with affordable solutions. Remember, the key is to focus on practicality and flexibility to meet your specific needs. With these tips, you’ll not only save money but also enjoy a more organized, functional home that makes life easier and more enjoyable for you and your family.

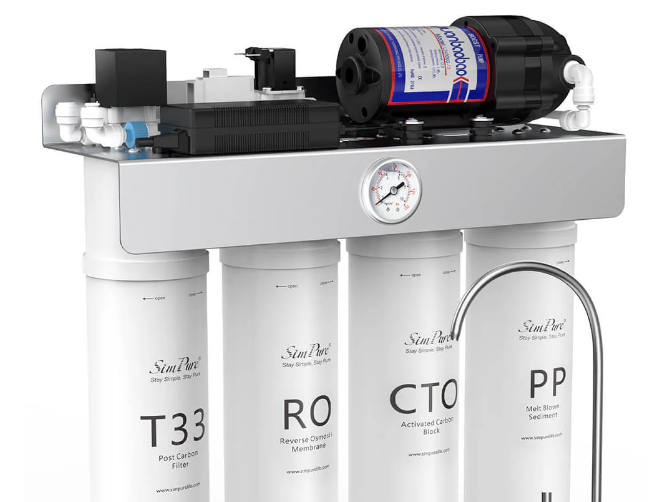
In today’s world, access to clean and safe drinking water is more important than ever. With increasing concerns over water contamination and pollutants, having a reliable water purification system at home is crucial. One such innovative solution is the SimPure T1-400 UV Tankless Reverse Osmosis System. This advanced water purification system combines the power of reverse osmosis with UV sterilization to deliver pure, great-tasting water right from your tap. Let’s delve into the features, benefits, and technology behind this impressive system.
The Need for Advanced Water Purification
Before exploring the specifics of the SimPure T1-400 UV Tankless Reverse Osmosis System, it’s essential to understand why such a system is necessary. Municipal water supplies, while generally safe, can still contain various contaminants such as chlorine, lead, pesticides, and bacteria. Even well water, often considered cleaner, can harbor sediments, minerals, and organic matter. These impurities not only affect the taste and smell of water but can also pose health risks over time.
Reverse osmosis (RO) is one of the most effective methods for removing contaminants from water. By forcing water through a semi-permeable membrane, RO systems can eliminate a wide range of impurities, providing cleaner, safer water for drinking and cooking.
Introducing the SimPure T1-400 UV Tankless Reverse Osmosis System
The SimPure T1-400 UV Tankless Reverse Osmosis System stands out in the crowded field of water purifiers with its advanced features and efficient design. Here’s an in-depth look at what makes this system a game-changer for home water purification:
1. Tankless Design
Unlike traditional RO systems that rely on a storage tank, the SimPure T1-400 features a tankless design. This not only saves space under your sink but also ensures a constant supply of freshly purified water. The tankless system eliminates the risk of bacterial growth that can occur in storage tanks, providing you with cleaner water every time you turn on the tap.
2. Advanced Filtration Technology
The SimPure T1-400 utilizes a multi-stage filtration process to ensure comprehensive purification:
- Sediment Filter: Captures larger particles such as sand, silt, and rust, protecting the subsequent filters and extending their lifespan.
- Activated Carbon Block Filter: Reduces chlorine, volatile organic compounds (VOCs), and other chemicals that affect water taste and odor.
- Reverse Osmosis Membrane: Removes up to 99% of dissolved solids, including heavy metals, salts, and other contaminants.
- Post Carbon Filter: Polishes the water, further improving taste and quality.
- UV Sterilization: The final stage employs UV light to kill any remaining bacteria and viruses, ensuring the highest level of water purity.
You can find more information and purchase the SimPure T1-400 UV Tankless Reverse Osmosis System directly from the official SimPure website: https://www.simpurelife.com/.
3. High Efficiency and Output
The T1-400 is designed to be highly efficient, producing up to 400 gallons of purified water per day. This high output makes it suitable for households of all sizes, providing an ample supply of clean water for drinking, cooking, and even washing fruits and vegetables.
4. Smart Monitoring and Maintenance
The system is equipped with smart monitoring features that keep track of filter life and water quality. An intuitive display panel alerts you when it’s time to replace filters, ensuring optimal performance and peace of mind. The filters are easy to replace, and the system is designed for minimal maintenance, making it user-friendly and convenient.
5. Eco-Friendly and Cost-Effective
By eliminating the need for plastic water bottles, the SimPure T1-400 helps reduce environmental waste. Additionally, the tankless design and efficient filtration process minimize water wastage, making it an eco-friendly choice. Over time, the system proves to be cost-effective, saving you money compared to buying bottled water or using less efficient filtration methods.
Benefits of the SimPure T1-400 UV Tankless Reverse Osmosis System
Investing in the SimPure T1-400 UV Tankless Reverse Osmosis System brings numerous benefits to your household:
- Improved Health and Safety
The comprehensive filtration and UV sterilization process ensure that your water is free from harmful contaminants, safeguarding your health and that of your family. You can trust that every glass of water is clean, pure, and safe to drink.
- Enhanced Taste and Quality
By removing chlorine, chemicals, and impurities, the SimPure T1-400 significantly improves the taste and quality of your drinking water. Enjoy refreshing, crisp water that enhances the flavor of your beverages and meals.
- Space-Saving Design
The tankless design of the SimPure T1-400 saves valuable space under your sink, making it an excellent choice for homes with limited storage. The compact system is easy to install and fits seamlessly into your kitchen setup.
- Convenience and Reliability
With smart monitoring and easy filter replacement, the SimPure T1-400 is designed for hassle-free operation. The high output ensures you always have a ready supply of purified water, and the system’s reliability means you can depend on it day in and day out.
- Environmental Responsibility
By choosing the SimPure T1-400, you’re making a positive impact on the environment. Reducing plastic waste and conserving water are significant steps toward a more sustainable lifestyle.
Conclusion
The SimPure T1-400 UV Tankless Reverse Osmosis System represents the future of home water purification. Its innovative design, advanced filtration technology, and user-friendly features make it an excellent choice for anyone looking to ensure their family has access to the highest quality drinking water. By investing in this system, you’re not only improving your health and well-being but also contributing to a more sustainable and eco-friendly lifestyle.
For more information on the SimPure T1-400 UV Tankless Reverse Osmosis System and to make a purchase, visit the official SimPure website: https://www.simpurelife.com/. Experience the difference between pure, clean water with SimPure.

LED neon strips have become one of the most popular lighting choices for both homes and businesses. They offer a bright, colorful glow that looks similar to traditional glass neon signs but without the fragility, high cost, or safety risks. Whether you want to add a decorative touch to your living room, highlight furniture edges, or create eye-catching signage for your shop, flexible LED neon strips are a practical and stylish solution. They are energy-efficient, long-lasting, and easy to install, making them a smart upgrade from older lighting options.
If you are looking for a reliable place to shop, https://leduastore.com/led-neon/ offers a wide selection of flexible LED neon strips suited for different applications and budgets. The product range covers various colors, sizes, and brightness levels, so you can find exactly what fits your project. Whether you need a single strip for a small accent wall or a bulk order for a commercial installation, the catalog is designed to meet both retail and wholesale needs with consistent quality.
What Is a Flexible LED Neon Strip?
A flexible LED neon strip is a type of lighting product that uses small LED chips embedded inside a soft silicone or PVC casing. The casing is shaped to diffuse light evenly, creating a smooth, continuous glow that mimics the look of traditional neon tubing. Unlike glass neon, these strips are bendable, lightweight, and much safer to handle. They do not contain gas or mercury, and they run at low voltage, which reduces the risk of electric shock or fire.
Key Features of LED Neon Strips
- Flexible and bendable design for curved or straight installations
- Available in single colors, RGB, and RGBW options
- Low power consumption compared to traditional neon
- IP65 or higher waterproof ratings available for outdoor use
- Can be cut at marked intervals to fit specific lengths
- Compatible with dimmers and smart controllers
Common Uses for LED Neon Strips
LED neon strips are incredibly versatile. They can be used in a wide range of settings, from residential interiors to commercial displays. Here are some of the most popular applications:
Interior Decoration
Many homeowners use LED neon strips to create ambient lighting in bedrooms, living rooms, and kitchens. They can be mounted along ceilings, behind furniture, or inside shelving units to add a warm or colorful glow. The flexible nature of the strip makes it easy to follow the contours of any surface.
Furniture Lighting
LED neon strips work very well for underlighting sofas, beds, and cabinets. This type of indirect lighting adds depth to a room and creates a modern, polished look. It is also a popular choice for custom furniture makers who want to add a premium finish to their products.
Commercial and Retail Signage
Businesses use LED neon strips to create logos, signs, and window displays. The strips can be shaped into letters and symbols, making them ideal for storefronts, restaurants, bars, and event spaces. They are far more durable and cost-effective than traditional neon signs and require much less maintenance.
Why Choose LED Neon Over Traditional Neon?
Traditional glass neon signs have a certain charm, but they come with serious drawbacks. They are fragile, expensive to produce, and require professional installation. They also consume significantly more electricity and can be dangerous if broken. LED neon strips solve all of these problems. They are shatter-resistant, easy to install without professional help, and consume up to 80% less energy. Their lifespan is also much longer, often exceeding 50,000 hours of use.
When shopping for LED neon products, it is important to choose a trusted supplier that offers quality-tested items. Ledua Store is a manufacturer and retailer that provides flexible LED neon strips along with a full range of LED lighting products including aluminum profiles, LED strip lights, and interior lighting solutions. The store serves both individual buyers and wholesale partners, offering competitive pricing and reliable delivery options.
How to Install a Flexible LED Neon Strip
Installing an LED neon strip is straightforward and does not require special tools in most cases. Follow these basic steps:
- Measure the area where you want to install the strip and cut it to the correct length at the designated cut points.
- Clean the surface thoroughly to ensure the adhesive backing sticks properly.
- Peel off the adhesive backing and press the strip firmly onto the surface.
- Connect the strip to the appropriate power supply or controller.
- Test the connection before finalizing the installation.
For more complex shapes or outdoor installations, additional mounting clips or waterproof connectors may be needed. Always check the product specifications to ensure the power supply matches the strip’s voltage requirements.
Conclusion
Flexible LED neon strips are a modern, efficient, and visually appealing lighting solution for almost any space. They combine the aesthetic appeal of classic neon with the practical benefits of LED technology. Whether you are decorating a home, upgrading a retail space, or creating custom signage, these strips offer excellent value and long-term performance. Choosing a reliable supplier with a broad product range and quality assurance will make your project easier and more successful from start to finish.
HOME IMPROVEMENT
Elevate Your Home’s Value with Home Improvement Strategies and Vostok Construction’s Expertise

Remodeling your home isn’t just about causing it to seem generally more appealing; it’s a smart investment that can significantly boost your property’s value. Whether you’re proposing to sell soon or simply need to upgrade your residing space, key home improvements can make a tremendous difference. In this article, we’ll investigate different home improvement strategies, with an exceptional spotlight on the expert services provided by Vostok Construction
Understanding Home Value
Factors Influencing Home Value
There are many factors that add to a home’s value, including area, economic situations, and property size. However, the condition and highlights of the actual home are basic. Redesigned homes with present day conveniences and aesthetic appeal frequently order greater costs.
The Role of Home Improvements
Home improvements can straightforwardly influence the resale esteem by tending to likely purchasers’ inclinations and necessities. From upgrading curb appeal to modernizing interiors, every improvement can add critical worth.
Curb Appeal: First Impressions Matter
Enhancing Your Home’s Exterior
The outside of your house is the main thing guests and potential purchasers see. A very much kept up with outside makes a positive first impression and establishes the tone until the rest of the property.
Landscaping Tips
Putting resources into proficient arranging can change your yard into an inviting space. Consider establishing local plants, making garden beds, and adding brightening components like water elements or nursery ways.
Driveway and Walkway Upgrades
A perfect, very much kept up with driveway and walkway can improve the general appearance of your home. Choices incorporate resurfacing, staining, or in any event, supplanting old cement with pavers or stone.
Interior Upgrades: Where to Invest
Kitchen Remodeling
Modern Appliances
Upgrading up to energy-effective, high-tech appliances can make your kitchen more useful and attractive. Stainless steel apparatuses, for instance, are generally popular.
Smart Storage Solutions
Maximizing storage space with custom cabinets and clever storage solutions can greatly improve the kitchen’s usability and appeal.
Bathroom Renovations
Luxurious Fixtures
Installing top of the line installations like rainfall showerheads, soaking tubs, and rich vanities can transform a standard bathroom into a spa-like retreat.
Space Optimization
Productive utilization of room, for example, adding racks and utilizing under-sink capacity, can cause even little bathrooms to feel more spacious and coordinated.
Smart Home Technology
Popular Smart Home Devices
Smart thermostats, security frameworks, and lighting are progressively famous. These gadgets offer comfort, security, and energy investment funds.
Integrating Smart Technology
Integrating smart home technology can be essentially as basic as adding smart plugs or as complicated as introducing an entire home automation system.
Remodeling Your Home
Planning Your Remodel
Before starting any remodeling project, make a definite arrangement. Consider the extent of work, materials required, and the general plan.
Budgeting and Financing
Set a realistic budget and explore financing choices if essential. Unexpected expenses can emerge, so it’s wise to have a possibility fund.
Choosing the Right Contractor
Selecting a reliable contractor is crucial for the success of your remodel. Look for experienced professionals with good reviews and transparent pricing.
Vostok Construction’s Expertise
For those looking for first rate remodeling services, Vostok Construction offers unparalleled expertise. Known for their attention to detail and top notch workmanship, Vostok Construction can deal with projects of any scale, guaranteeing that your redesign is finished on time and within budget.
Outdoor Living Spaces
Designing a Functional Patio
A very much planned patio can broaden your living space outside. Consider adding happy with seating, a fire pit, and climate safe decorations.
Building an Outdoor Kitchen
An outside kitchen outfitted with a barbecue, sink, and capacity can make outdoor entertaining more pleasant and increment your home’s appeal.
Home Maintenance Tips
Seasonal Maintenance Checklist
Regular maintenance can prevent costly repairs down the line. Make an agenda for seasonal tasks like cleaning drains, really looking at central air frameworks, and investigating the rooftop.
Protection Measures
Going to protection lengths, like sealing cracks and adjusting appliances, can broaden the existence of your home’s parts and systems.
Conclusion
Remodeling your house is a compensating endeavor that can essentially expand its worth and upgrade your living experience. From redesigning your kitchen to extending your living space, each improvement counts. With the mastery of experts like Vostok Construction, you can guarantee your projects are finished to the best expectations. Start planning your home improvement journey today and enjoy the advantages for quite a long time into the future.


 HOME IMPROVEMENT1 year ago
The Do’s and Don’ts of Renting Rubbish Bins for Your Next Renovation
- BUSINESS1 year ago
Exploring the Benefits of Commercial Printing
- HOME IMPROVEMENT10 months ago
Get Your Grout to Gleam With These Easy-To-Follow Tips

 HEALTH11 months ago
The Surprising Benefits of Weight Loss Peptides You Need to Know
- TECHNOLOGY1 year ago
Dizipal 608: The Tech Revolution Redefined
- BUSINESS1 year ago
Brand Visibility with Imprint Now and Custom Poly Mailers
- HEALTH10 months ago
Your Guide to Shedding Pounds in the Digital Age
- LAW2 years ago
7 Key Questions to Ask When Hiring a Criminal Lawyer