HOME IMPROVEMENT
How to Effectively Deal with Mold in Your Home and Office

Mold growth in homes and offices can cause more than just an eyesore; it can also lead to serious health problems, property damage, and a decline in air quality. If you suspect that mold is present in your living or working space, it’s essential to take immediate action. Mold thrives in damp, poorly ventilated areas, making it particularly common in basements, bathrooms, and kitchens. Fortunately, dealing with mold is possible if approached with the right steps and precautions.
Understanding the Causes of Mold Growth
Mold needs a few basic conditions to thrive: moisture, warmth, and organic material like wood, drywall, or carpet. In many homes and offices, mold develops due to water leaks, high humidity, or poor ventilation. Leaking pipes, roofs, or windowsills create moist conditions that mold loves, while areas with inadequate air circulation, such as basements or attics, can trap moisture and contribute to mold growth.
The first step in preventing mold is to identify and address the sources of moisture. Whether it’s a leaky faucet, a faulty HVAC system, or even condensation from high humidity, eliminating the root cause is vital for effective mold management. Once the moisture problem is under control, you can begin the process of removing existing mold.
Identifying Mold in Your Space
Mold can sometimes go unnoticed until it becomes a serious issue. The first signs of mold growth often appear as dark spots or patches on walls, ceilings, or floors. These patches can range in color from white and green to black or brown, depending on the type of mold. In addition to visible signs, you may notice a musty or earthy smell in the affected area.
If you’re unsure whether mold is present or if you’re dealing with extensive mold growth, scheduling a mold assessment is a smart move. Professional mold assessments are thorough and can identify hidden mold growing in hard-to-reach areas. They also provide insight into the type of mold present, which can help you determine the necessary treatment plan.
Steps to Remove Mold Safely
Once you’ve identified mold, it’s time to remove it, but safety is paramount. Mold removal can release spores into the air, worsening health problems, especially for those with respiratory issues or allergies. Here are some essential steps for dealing with mold safely:
- Wear Protective Gear: Always wear gloves, goggles, and a face mask or respirator when handling moldy areas. This will help prevent direct contact with mold and reduce the chances of inhaling spores.
- Use Cleaning Solutions: For smaller mold infestations, use a mixture of water and soap or a diluted bleach solution (one cup of bleach to one gallon of water). Scrub the affected surfaces with a brush or cloth to remove the mold. Remember that bleach should never be used on porous materials like wood, as it may not fully eradicate the mold.
- Dispose of Contaminated Materials: Items that cannot be effectively cleaned, such as carpets, insulation, or drywall, should be safely discarded to prevent the spread of mold spores. Always double-bag moldy materials before disposal to minimize exposure.
- Dry and Ventilate the Area: After cleaning, ensure that the area is thoroughly dried. Use fans or dehumidifiers to lower humidity levels and promote airflow. Ventilation can also help prevent mold from returning in the future.
When to Call a Professional for Mold Removal
While smaller mold issues can often be handled by homeowners, there are situations where professional help is necessary. If the mold covers a large area (greater than 10 square feet), it’s advisable to consult a mold removal expert. Professionals have the training and equipment to deal with extensive infestations and can ensure that the mold is removed safely and completely.
Mold remediation companies also offer comprehensive solutions, including mold testing and the use of advanced cleaning methods like HEPA filtration and antimicrobial treatments. They can also help you determine the best ways to prevent mold from returning, such as improving ventilation and sealing any cracks or leaks in your home or office.
Preventing Mold Growth in the Future
Once you’ve dealt with the immediate mold problem, the next step is to focus on prevention. Keeping your space dry and well-ventilated is key. Here are some tips to help you prevent mold growth in the future:
- Maintain Humidity Levels: Use dehumidifiers in damp areas like basements or bathrooms to keep humidity levels under control. Aim for a humidity level of around 30-50%.
- Fix Leaks Promptly: Address any water leaks immediately to prevent moisture from building up in walls, ceilings, or floors. Repair leaks in the roof, plumbing, and windows as soon as they are noticed.
- Improve Ventilation: Ensure that your home or office has proper ventilation, especially in areas that are prone to moisture, such as bathrooms, kitchens, and laundry rooms. Use exhaust fans, and open windows to promote air circulation.
- Regular Inspections: Regularly inspect areas that are prone to mold growth. Early detection can save you from dealing with larger infestations.
Dealing with mold requires both prompt action and prevention strategies to ensure your space remains safe and healthy. While homeowners often handle minor mold issues, larger or persistent problems may require professional intervention. An expert mold assessment can help you better understand the severity of the issue and develop a plan for effective treatment. By identifying the source of moisture, removing mold safely, and taking steps to prevent future growth, you can protect both your home and your health.

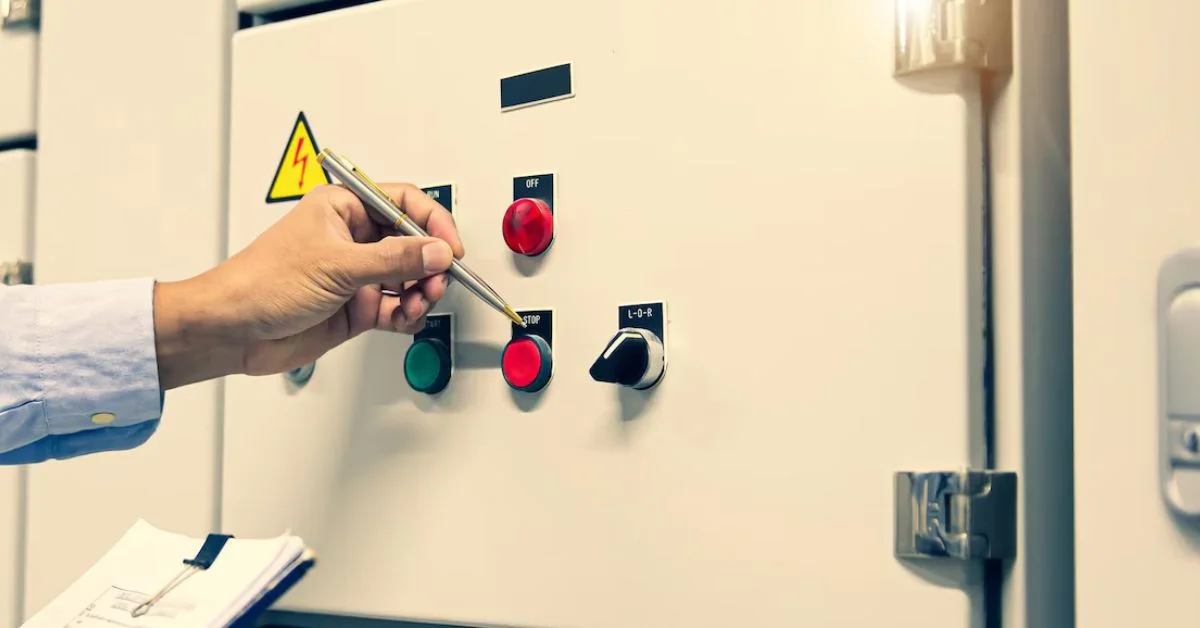
DIY home projects are a great way to save money and broaden your own skills, however, DIY can quickly turn perilous when electrics are involved. There are over 28 million DIYers in the UK, all of whom have the intention of improving their homes, however, there are some very real risks involved.
With electrical DIY, improper work can lead to short-circuiting, electrocution and even house fires. Here are some dangerous electrical DIY mistakes you should aim to avoid.
Cutting Wires Too Short
One common pitfall is cutting wires too short. This mistake can lead to poor connections and junction box overloads which heightens the risk of electrical fires. Sufficient wire length ensures that your connections are secure and aids future repairs or adjustments. This is all without the need to splice additional wire segments, which can compromise the integrity of the electrical system.
Having the right tools for electrical cutting is essential during this task. Hydraulic cable cutters not only make the job easier but also reduce the chance of electrocution and shorting.
Leaving Sockets and Switches Loosely Connected
Loose connections in sockets and switches can lead to arcing, which is a type of electrical discharge that generates heat and can ignite surrounding materials. Loose connections can also allow live wires to wiggle loose, exposing them to your fingers.
Ensuring that all connections are tight and secure is fundamental to preventing electrical fires and maintaining an efficient electrical system.
To ensure safe and efficient handling of complex electrical systems, it’s highly recommended to consult professional services like Electronic Power Design. Their expertise in electrical systems integration can help prevent issues such as loose connections and overloaded electrical boxes, reducing the risk of fires or shocks. You can learn more about their services here.
Overfilling Electrical Boxes
Cramming too many wires into an electrical box can cause overheating and electrical failure. Each box is designed to hold a certain number of wires to prevent overheating and allow for safe operation.
Overfilling these boxes not only risks short circuits but also makes future maintenance more challenging.
Wiring a Circuit Breaking Device Backwards
Improper installation of circuit breakers or wiring them backward can compromise the safety mechanisms designed to protect your home from electrical overloads and shorts. This can happen in RCBO or MCB devices in the UK or a GFCI in the US and can potentially lead to catastrophic consequences such as fires and lethal shocks.
Installing Cables Without a Clamp
Cable clamps are not an optional accessory, these tools are a necessity. They secure the cable to the box and protect the insulation from damage. Without a clamp, cables can move freely, leading to wear on the insulation and potentially exposing live wires. This oversight can lead to overheating, short circuits, fires and electrical shocks if touched.

Introduction
In today’s fast-paced world, maintaining a clean and organized home is often overlooked amidst hectic schedules and busy lifestyles. However, the significance of a clean living space goes beyond mere aesthetics. It contributes to our physical health, mental well-being, and overall quality of life. In this comprehensive guide, we will delve into the art of house cleaning, offering practical tips, techniques, and insights to help you achieve a sparkling, clutter-free home environment.
Getting Started with House Cleaning
To embark on your house cleaning journey, it’s essential to establish a structured approach. Begin by crafting a cleaning schedule tailored to your needs and lifestyle. Determine which areas of your home require regular attention and allocate specific tasks accordingly. Additionally, ensure you have the necessary cleaning supplies on hand, including cleaning agents, tools, and equipment.
Room-by-Room Cleaning Guide
Each room in your home presents unique cleaning challenges and requirements. We’ll explore effective cleaning strategies for key areas such as the kitchen, bathroom, living room, and bedroom. From sanitizing kitchen surfaces to organizing closet spaces, you’ll discover practical tips to maintain cleanliness and order throughout your home.
Deep Cleaning Techniques
In addition to routine maintenance, periodic House Cleaning in Fort Collins is essential to address stubborn dirt, stains, and grime. Learn expert techniques for revitalizing carpets, upholstery, windows, and more. Whether tackling accumulated dust or banishing pesky stains, you’ll uncover effective solutions to restore your home’s pristine condition.
Eco-Friendly Cleaning Solutions
Concerned about the environmental impact of conventional cleaning products? Discover the benefits of eco-friendly alternatives derived from natural ingredients. We’ll share DIY cleaning recipes and eco-conscious cleaning brands to help you minimize your carbon footprint while keeping your home clean and healthy.
Time-Saving Cleaning Hacks
Short on time? Fear not! Our time-saving cleaning hacks will streamline your cleaning routine without compromising on results. From quick cleaning methods for busy weekdays to multitasking strategies, you’ll learn how to maximize efficiency and achieve a spotless home in less time.
Dealing with Clutter and Organization
Clutter can detract from the beauty and functionality of your living space. Explore practical decluttering strategies and organization tips to reclaim space and create a harmonious home environment. Whether you’re tackling overflowing closets or optimizing storage solutions, we’ll guide you through the process of simplifying your surroundings.
Maintaining a Clean Home Routine
Consistency is key to maintaining a clean and orderly home. Learn how to incorporate daily, weekly, and monthly cleaning tasks into your routine to prevent accumulation and ensure long-term cleanliness. By cultivating simple yet effective habits, you’ll effortlessly uphold the cleanliness of your home.
Hiring Professional Cleaning Services
In some instances, outsourcing cleaning tasks to professionals may be the optimal solution. Discover when to consider hiring professional cleaning services and how to select reputable cleaning companies. Whether you need occasional assistance or regular maintenance, professional cleaners can provide invaluable support in keeping your home immaculate.
Conclusion
In conclusion, house cleaning is not merely a chore but a cornerstone of a healthy and harmonious lifestyle. By implementing the tips and techniques outlined in this guide, you’ll transform your home into a sanctuary of cleanliness and comfort. Embrace the journey towards a tidier, happier living space and reap the countless benefits it brings.
FAQs
How often should I deep clean my home?
- Deep cleaning frequency depends on various factors such as household size, lifestyle, and level of cleanliness desired. Generally, deep cleaning every three to six months is recommended for maintaining a healthy and hygienic living environment.
What are the essential cleaning supplies every household should have?
- Essential cleaning supplies include multipurpose cleaner, disinfectant wipes, microfiber cloths, scrub brushes, vacuum cleaner, mop, bucket, and gloves. These items facilitate effective cleaning of various surfaces and areas within the home.
Are natural cleaning products as effective as conventional ones?
- Yes, natural cleaning products can be just as effective as conventional ones, if not more. Ingredients such as vinegar, baking soda, and lemon have powerful cleaning properties and are safer for the environment and human health. They effectively remove dirt, stains, and odors without harmful chemicals.
How can I maintain cleanliness in high-traffic areas of my home?
- High-traffic areas such as entryways, hallways, and living rooms require frequent attention to prevent dirt buildup. Implementing measures such as placing doormats at entrances, enforcing a no-shoes policy indoors, and regular vacuuming or sweeping can help maintain cleanliness in these areas.
What are the advantages of hiring professional cleaning services?
- Professional cleaning services offer numerous benefits, including expertise in deep cleaning techniques, time savings, and convenience. They use professional-grade equipment and products to achieve superior results, freeing homeowners from the burden of intensive cleaning tasks.

Did you know that grout can harbor mold and mildew if not properly cleaned and maintained?
By following a few simple tips, you can transform your grout from dull to dazzling.
With just a few easy-to-follow steps, you can have your grout looking as good as new in no time.
So, are you ready to give your grout the gleam it deserves?
Assess Your Grout Condition
To determine the condition of your grout, start by inspecting the color and texture for any signs of wear or discoloration. Over time, grout can become discolored or worn, especially in high-traffic areas like the kitchen or bathroom. If you notice any cracks, stains, or areas where the grout has worn away, it may be time for a tile and grout service. A professional tile & grout service provider can help restore the appearance of your grout and prevent further damage.
Regular maintenance with a tile and grout cleaner can also help in keeping your grouts in top condition. Using a specially formulated cleaner designed for grouts can help remove dirt, mold, and mildew buildup. By regularly cleaning your grouts, you can prolong its lifespan and keep it looking fresh and clean.
However, for stubborn stains or extensive cleaning needs, consider professional tile and grout cleaning. These services can tackle tough jobs and restore your tile and grout to its original beauty.
Gather Cleaning Supplies
Inspecting your grout condition is crucial before proceeding to gather the necessary cleaning supplies for maintenance. Once you’ve assessed the grouts and identified the areas that need attention, it’s time to gather your cleaning supplies.
Start by checking your cleaning cabinet for items like a grout brush, scrubbing sponge, white vinegar, baking soda, hydrogen peroxide, and a bucket. These are common household items that can effectively clean grout without causing damage. If you don’t have these supplies on hand, make a quick trip to the store to pick them up.
Additionally, consider investing in a tile and grout cleaner specifically formulated for tougher stains if your grout requires extra care. Having all the necessary supplies ready before you start cleaning will make the process smoother and more efficient. Once you have everything gathered, you’ll be prepared to tackle the grime and restore your grout to its former glory.
Choose the Right Cleaning Method
For effective grout cleaning, consider selecting the appropriate cleaning method based on the type of grime and stains present. Different cleaning methods are more effective for specific types of grouts dirt and stains.
For general dirt and mild stains, a mixture of baking soda and water can be a gentle yet efficient option. This method is especially useful for maintenance cleaning.
If your grouts is plagued with tougher stains like mold or mildew, a mixture of equal parts water and vinegar can help tackle these more stubborn marks. Vinegar is known for its disinfecting properties and can help remove mold and mildew effectively.
For tougher stains like grease or oil, a paste made of baking soda and hydrogen peroxide can be a powerful solution. The bubbling action of hydrogen peroxide combined with the abrasive texture of baking soda can work wonders on these stubborn stains.
Choose the cleaning method that aligns best with the specific grime and stains you’re facing for optimal results.
Scrub and Clean Thoroughly
For a thorough grout cleaning process, ensure you scrub and clean diligently to eliminate all traces of dirt and stains effectively. Start by preparing a cleaning solution using water and a suitable grouts cleaner or a mixture of baking soda and vinegar for a natural alternative. Apply the solution generously onto the grouts lines and let it sit for a few minutes to loosen the dirt.
Next, take a stiff-bristled brush or an old toothbrush and scrub the grouts lines vigorously. Focus on areas with visible stains or discoloration, applying extra pressure as needed. Work in small sections to ensure thorough cleaning and pay attention to corners and edges where grime tends to accumulate.
After scrubbing, use a damp cloth or sponge to wipe away the cleaning solution and dirt residue. Rinse the cloth or sponge frequently to prevent dirt from spreading back onto the grouts. Finally, dry the grout lines with a clean towel to reveal a sparkling, clean finish.
Scrubbing and cleaning diligently is key to achieving gleaming grouts that enhances the overall appearance of your tiled surfaces.
Maintain Grout’s Shine
Wondering how to keep your grout looking shiny and well-maintained? To maintain your grout’s shine, regular upkeep is key. After cleaning your grouts thoroughly, apply a grout sealer to protect it from dirt and stains. This will also help in preserving its shine and preventing discoloration. Make sure to reapply the sealer as recommended to ensure long-lasting protection.
In addition to sealing, routine cleaning is essential for maintaining the shine of your grouts. Use a non-acidic cleaner and avoid harsh chemicals that can dull the grouts over time. Regularly wiping down your grouts lines with a damp cloth can prevent dirt buildup and keep them looking fresh.
Another tip to maintain your grout’s shine is to avoid using abrasive tools or scrubbers that can scratch the surface. Opt for gentle cleaning methods to preserve the shine and integrity of your grouts. By following these simple steps, you can ensure that your grouts remains shiny and well-maintained for years to come.
Conclusion
Now that you’ve learned how to get your grout to gleam, maintaining its shine is as easy as keeping up with regular cleaning. By assessing the condition, gathering the right supplies, choosing the proper cleaning method, and scrubbing thoroughly, you can ensure your grouts stays looking its best. While you can tackle grouts cleaning as a DIY project, it’s important to note that DIY methods may not be specific to your surface or the issue at hand. This means that the real underlying problem might not be resolved. Therefore, it’s always better to seek the help of a professional who can provide targeted solutions for your grout’s unique needs.


 ENTERTAINMENT1 week ago
Exploring the Kristen Archives: A Treasure Trove of Erotica and More

 TECHNOLOGY4 months ago
Blog Arcy Art: Where Architecture Meets Art
- LIFESTYLE1 week ago
Who Is Sandra Orlow?
- LIFESTYLE4 months ago
The Disciplinary Wives Club: Spanking for Love, Not Punishment
- ENTERTAINMENT5 days ago
Kiss KH: The Streaming Platform Redefining Digital Engagement and Cultural Currents
- GENERAL4 months ago
What are stories of male chastity? A Comprehensive Guide
- ENTERTAINMENT4 weeks ago
MonkeyGG2: Your Personal Gaming Hub
- GENERAL5 months ago
SmartSchoolBoy9: The Rise of a Viral Chasing Kid Sensation